

How to Use the Monero GUI Wallet (2026 Guide)
What this GUI wallet guide covers
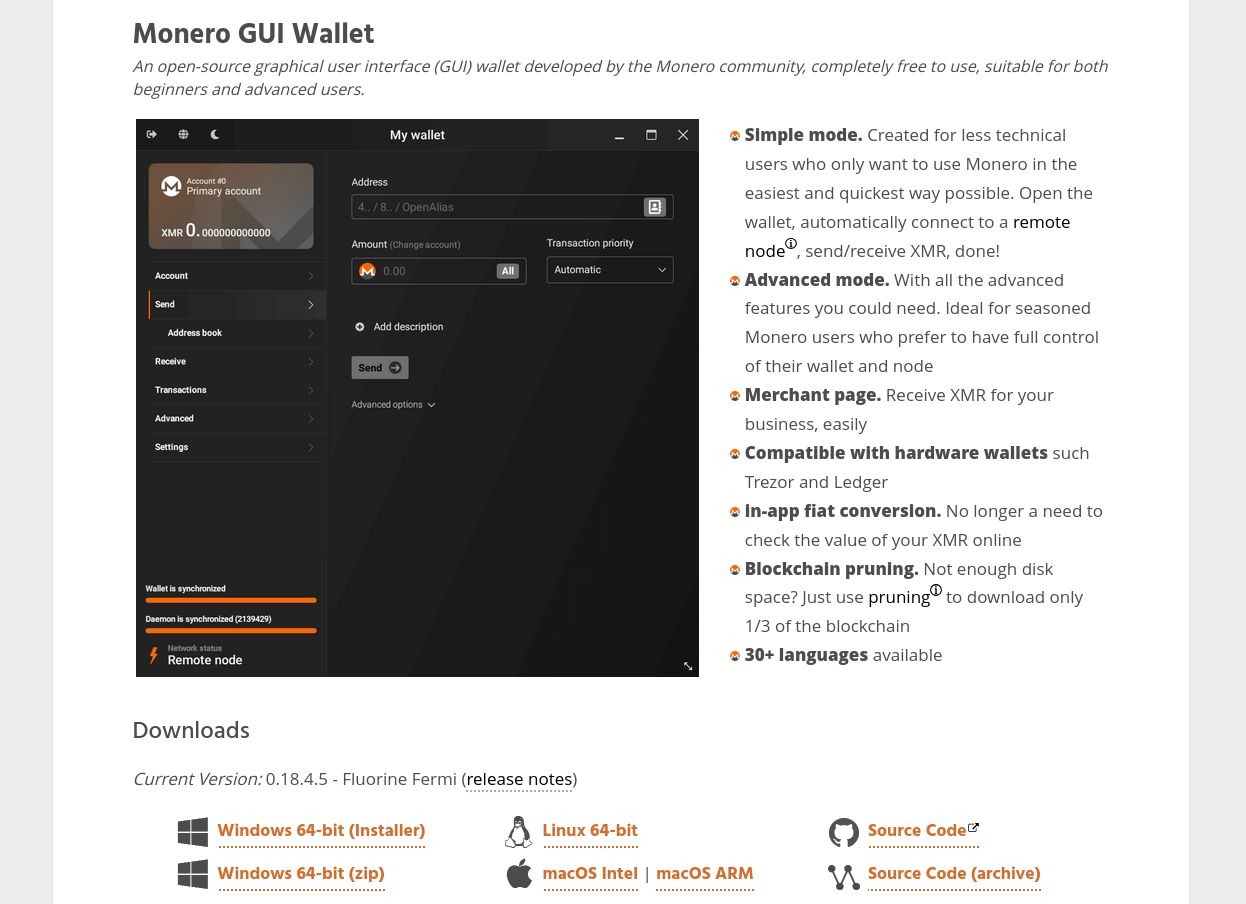
In this tutorial, we show you how to download and use the Monero GUI wallet. The download includes the GUI (graphical user interface) wallet application and the Monero daemon (monerod). The GUI wallet is used to securely store your Monero, check your balance, and send and receive XMR. The daemon communicates with the Monero network to scan for incoming transactions and broadcast outgoing ones.
See our Monero glossary for full definitions of terms used in this tutorial.
Downloading and Verifying
Always download the Monero GUI wallet from the official source. The current release is v0.18.4.5 "Fluorine Fermi". Download the version for your operating system from the official Monero downloads page.
Verify your download (strongly recommended)
The Monero project strongly advises verifying the hash of your download before running it. A mismatched hash means the file may have been tampered with, which could result in loss of funds. After downloading, compare the SHA256 checksum of your archive against the hashes published on the official downloads page.
On Windows (PowerShell):
On Linux (terminal):
Compare the output to the corresponding entry in the official hashes file. They must match exactly. If they do not match, delete the file and re-download from the official site.
Choosing a Wallet Mode
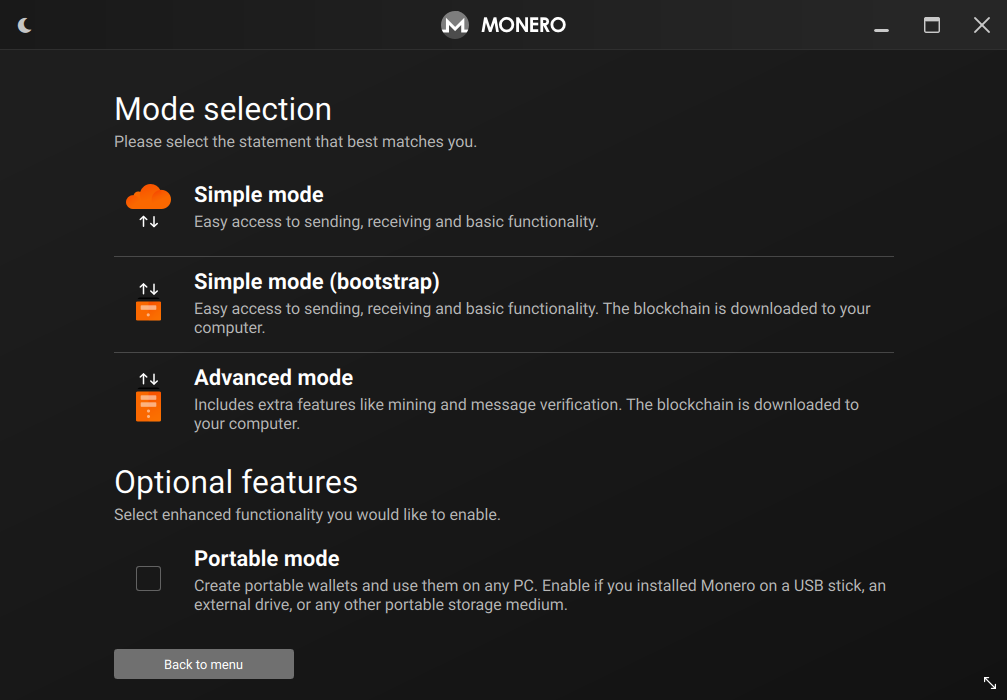
When you first launch the Monero GUI wallet, you will be asked to choose a wallet mode. This determines how the wallet connects to the Monero network. There are three options:
| Mode | How it connects | Disk space needed | Privacy level | Best for |
|---|---|---|---|---|
| Simple Mode | Connects to a random public remote node automatically | None (no blockchain download) | Lower — remote node sees your IP and which blocks you request | Quick start, small amounts, users who cannot run a full node |
| Simple Mode (Bootstrap) | Uses a remote node while downloading the blockchain locally in the background | 200 GB+ over time | Moderate — transitions to full privacy once local sync completes | Users who want to start immediately and move to a local node later |
| Advanced Mode | Uses your own locally synced node by default; can be configured to use a custom remote node | 200 GB+ (or ~70 GB with pruning) | Highest — your node validates all transactions independently | Users who prioritize full privacy, security, and network contribution |
Recommendation: If you have the disk space (200 GB or more), choose Simple Mode (Bootstrap) or Advanced Mode. These modes eventually run a local node, which gives you the best privacy and contributes to the Monero network's decentralization. If you are getting started quickly or have limited disk space, Simple Mode is acceptable for small amounts, but be aware that the remote node can observe your IP address and the blocks your wallet requests. See how to run a Monero node for more on local nodes.
Creating Your First Wallet
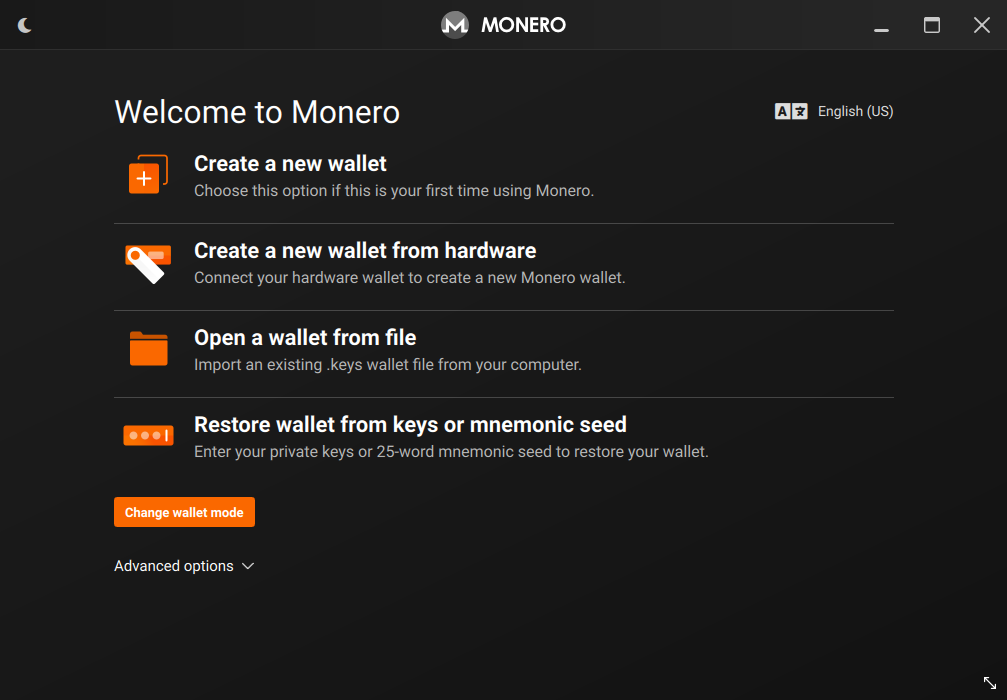
After selecting your wallet mode, you will see the welcome screen. Click "Create a new wallet" to begin.
Wallet name and location
You will be asked to choose a name and save location for your wallet file. The name is only stored locally on your computer and is never shared with anyone, so it will not affect your privacy. Choose a save location you can easily back up, such as an encrypted USB drive.
Your seed phrase
The wallet will generate a unique 25-word seed phrase (also called a mnemonic seed). This seed is a human-readable representation of your private key — the single piece of information that controls access to your funds.
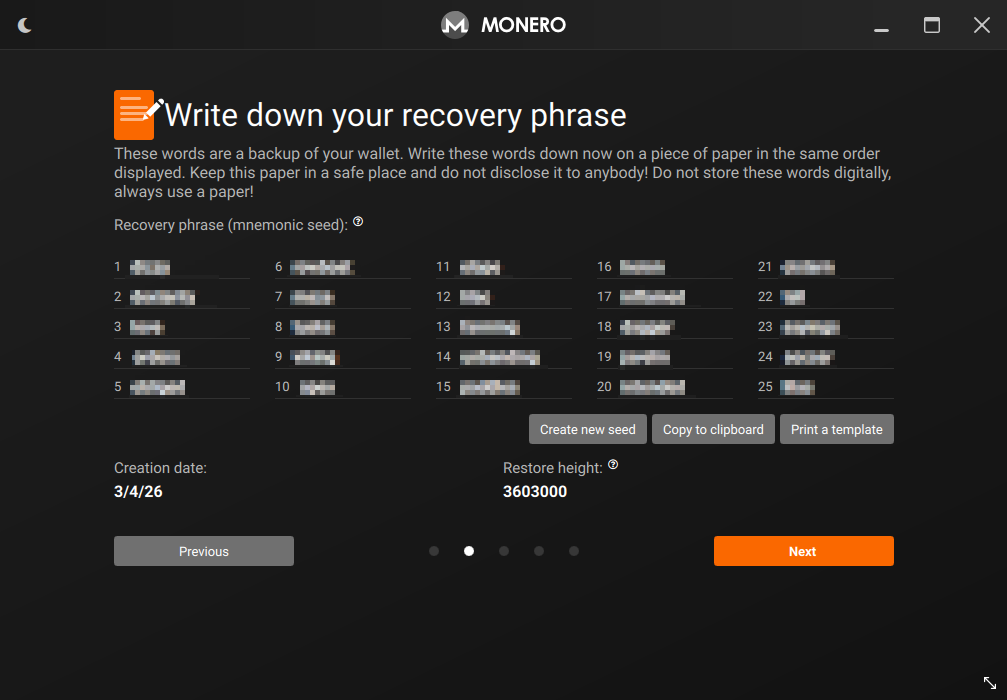
Write your seed phrase on paper immediately. Store it somewhere secure and offline — not in a photograph, not in a text file, and not in cloud storage. If you lose your wallet file, the seed phrase is the only way to recover your funds. We have a dedicated paper wallet and cold storage tutorial for guidance on secure seed storage.
You do not need the seed phrase to open your wallet day-to-day. The wallet password you set in the next step is what you use for routine access.
Setting a wallet password
You will be asked to set a password. This password encrypts your wallet file on disk, protecting it if someone gains access to your computer. Choose a strong, unique password. Remember: this password protects your local wallet file only. If you need to restore your wallet on a different device, you will use the 25-word seed, not this password.
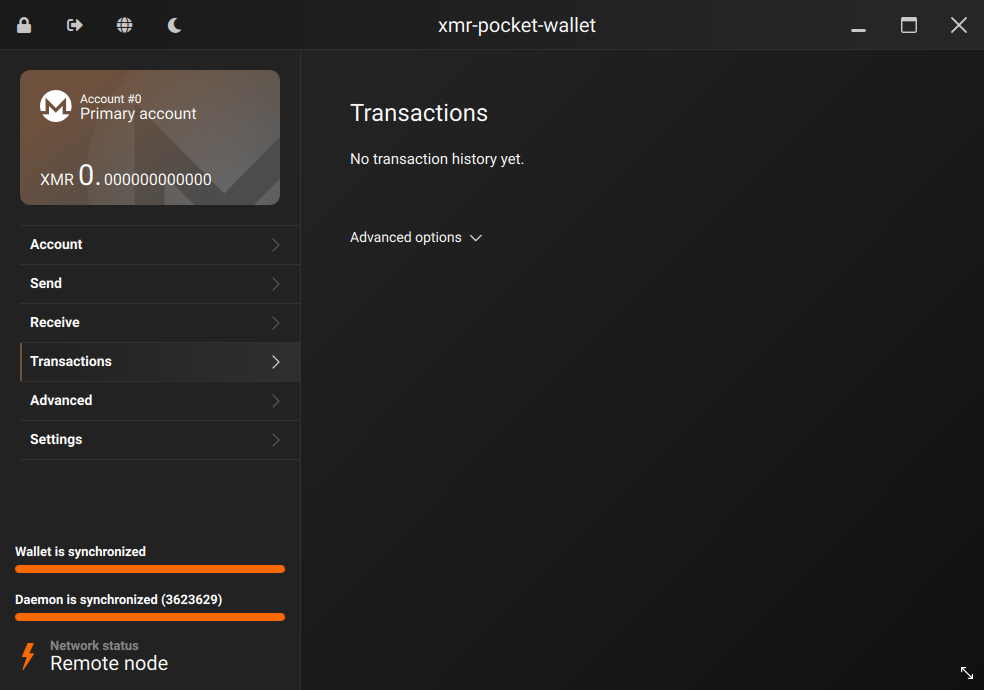
The Monero Main Screen
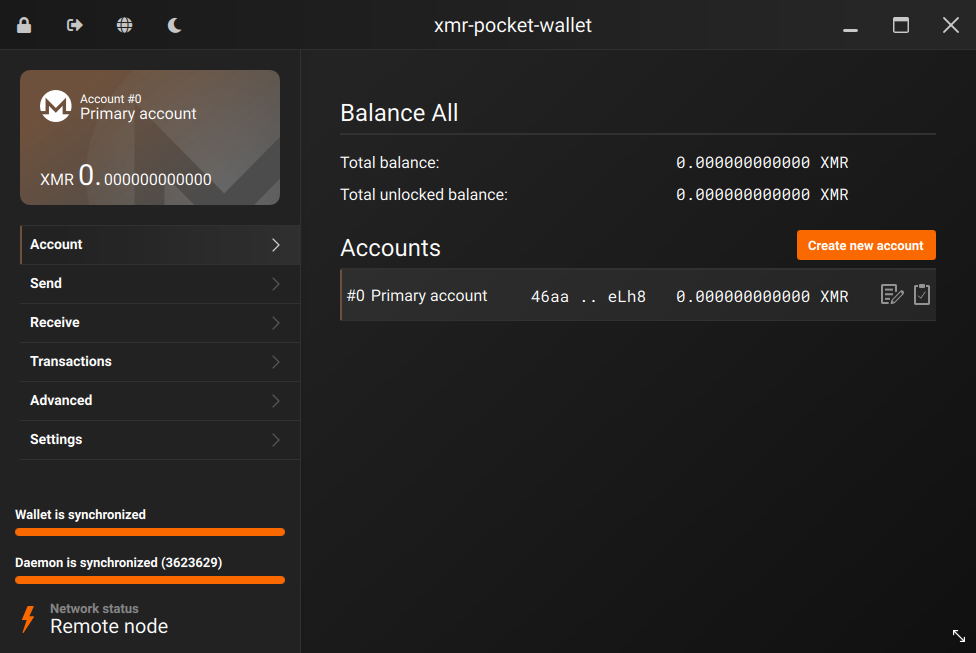
In the top area of the main screen, you will see two balance figures:
- Balance: the total XMR in your wallet, including recently received funds that are still being confirmed.
- Unlocked balance: the amount available to spend. Newly received funds require approximately 10 confirmations (around 20 minutes) before they unlock. See how long Monero transactions take to confirm for more detail.
Starting and Monitoring the Daemon
The Monero daemon (monerod) is a background program that connects your wallet to the Monero network. It synchronizes the blockchain, scans for incoming transactions, and broadcasts outgoing ones. Without the daemon running, your wallet cannot check its balance or send funds.
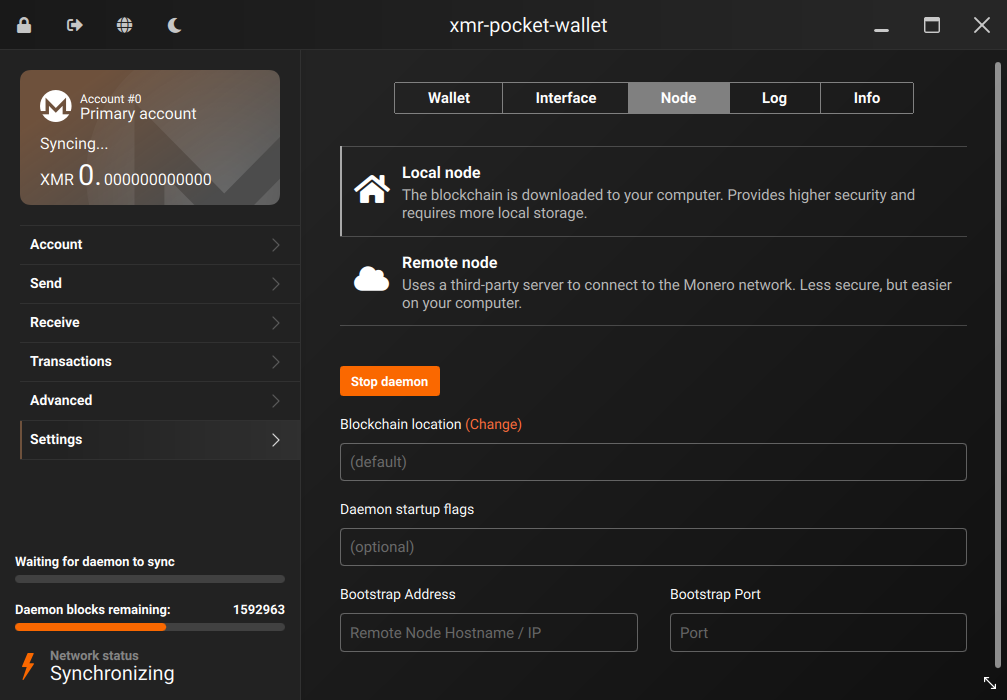
If you chose Simple Mode, the daemon connects automatically to a public remote node and you can use the wallet immediately without waiting for a sync. If you chose Advanced Mode, the daemon will begin downloading the full Monero blockchain. The initial sync can take one to several days depending on your hardware and internet connection. You can see sync progress in the status bar at the bottom of the wallet window.
You can speed up the initial sync by following the guidance in our tutorial on speeding up the initial blockchain sync.
Receiving Funds
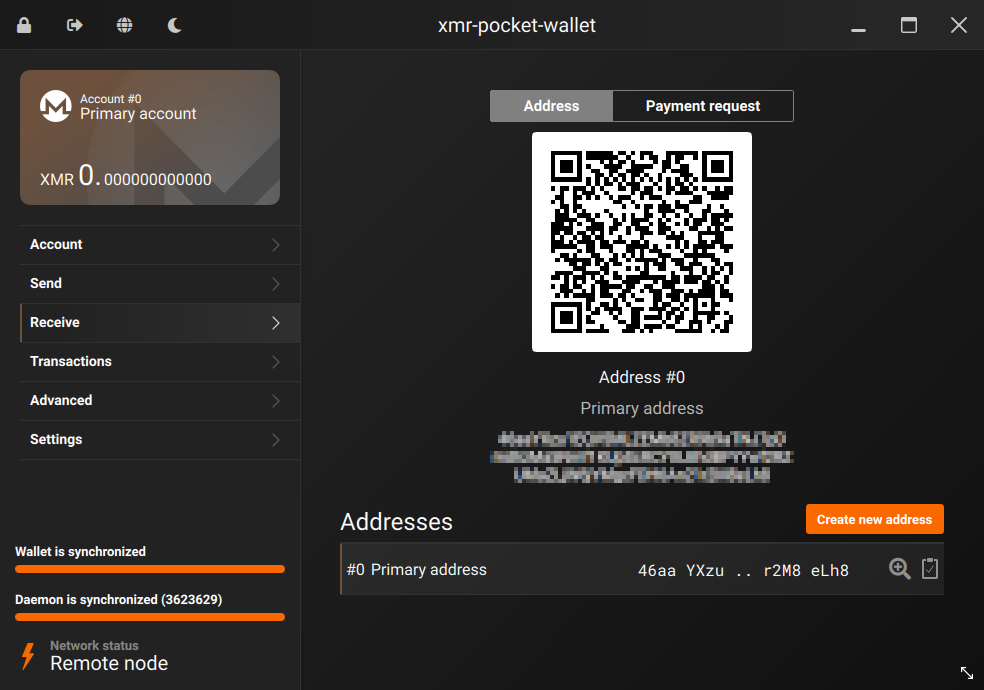
Your Monero wallet has a unique public address. To receive funds, go to the Receive tab and share your address with the sender.
Subaddresses (recommended)
For better privacy, use subaddresses instead of your primary address when receiving funds. Subaddresses are unique receiving addresses that cannot be linked to each other or to your primary address on the blockchain. The Receive tab allows you to create as many subaddresses as you need and label them (for example, "work payments" or "marketplace"). Each subaddress you generate is safe to share publicly without revealing your primary address or your total balance.
To create a subaddress, click "Create new address" in the Receive tab, optionally add a label, and share the new address with the sender.
Once funds are received, they will appear in your balance and transaction history after the required confirmations. See our Monero glossary for definitions of terms shown on this screen.
Sending Funds
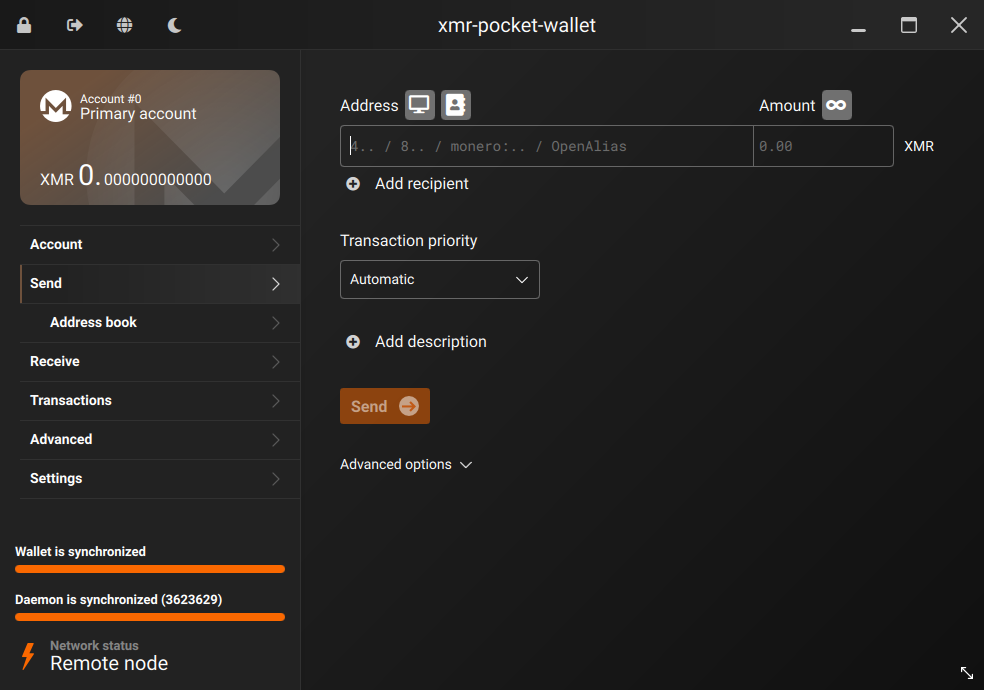
To send XMR, click the Send tab, enter the recipient's Monero address and the amount, then click Send. Always verify the address carefully before confirming — transactions on the Monero network are irreversible.
Transaction priority and fees
You will rarely need to change the transaction priority from its default. Monero's adaptive block size mechanism allows the network to accommodate increased transaction volume automatically, so manually raising priority is only useful in exceptional circumstances. Increasing priority raises the transaction fee you pay. See Monero transaction fees for a detailed explanation.
A note on payment IDs
Older guidance recommended specifying a payment ID when sending to certain recipients. Payment IDs have been deprecated. Most exchanges and services now use subaddresses (addresses beginning with "8") which embed identification internally, eliminating the need for a separate payment ID field. If a recipient asks for a payment ID, ask them to provide a subaddress (integrated address) instead. If you are sending to a legacy service that still requires a payment ID, the GUI wallet still supports this in Advanced Mode — but this is uncommon in 2026.
Transaction History
The History tab shows a complete list of all incoming and outgoing transactions. This history is stored locally in your wallet file. If you restore a wallet from seed phrase alone (without restoring the wallet file), transaction labels and history prior to the restore height will need to be re-scanned from the blockchain.
Running the Wallet on a Linux Live USB
If you are booting from a Linux Live USB or LiveCD environment, be aware that the system runs entirely in RAM with no persistent storage. This means you cannot download and store the Monero blockchain locally, regardless of how much RAM you have — RAM is not persistent disk storage. You will need to connect to a remote node to use the wallet.
Our dedicated guide, Set up a Monero wallet on a USB pendrive Linux computer using a remote daemon, covers the full setup in detail, including how to connect securely to a trusted remote node via SSH tunnel.
Common Problems
- Balance shows zero after receiving funds: The daemon may still be syncing. Wait for the sync progress bar to reach 100% before expecting your balance to reflect recent transactions.
- Wallet won't open or shows an error on launch: Ensure you have extracted all files from the downloaded archive into the same folder. Do not run the wallet from inside the compressed archive.
- Antivirus software flags the Monero executable: This is a known false positive affecting several security tools. Verify the hash of your download as described above, and add an exception in your antivirus software if the hash matches. Never skip hash verification and assume a flagged file is safe.
- Sync is extremely slow or stuck: See our guide on speeding up the initial blockchain sync. Ensure your system clock is accurate, as clock skew can cause sync issues.
- Transaction not appearing in history: If you restored a wallet from seed, the wallet must re-scan the blockchain from the restore height. This can take time. Ensure the daemon is running and fully synced.
- Sent funds not received by recipient: Confirm you entered the correct and complete address. Monero addresses are 95 characters long for primary addresses, or 97 characters for subaddresses. Truncated or miscopied addresses will result in failed or lost transactions.
Frequently Asked Questions
What is the difference between Simple Mode and Advanced Mode in the Monero GUI wallet?
Simple Mode connects your wallet automatically to a publicly available remote node, so you can start using Monero immediately without downloading the full blockchain. Advanced Mode runs a local copy of the Monero daemon (monerod), which downloads and validates the full blockchain on your own computer. The practical implication is that Simple Mode is faster to start but requires trusting a third-party node operator not to log your IP address or the blocks you request; a remote node cannot steal your funds or see your private keys, but it can observe which transactions your wallet scans for. Advanced Mode provides the strongest privacy because your own node validates every transaction independently. Common misunderstanding: Simple Mode is sometimes assumed to be "less secure" in the sense that it exposes your funds — it does not. The privacy reduction is about metadata (which transactions you request), not about fund security. For users handling significant amounts, Advanced Mode is the recommended default.
What should I do if I lose my wallet file but still have my 25-word seed phrase?
Your seed phrase is sufficient to fully recover your wallet on any device. Open the Monero GUI wallet, select "Restore wallet from keys or mnemonic seed" on the welcome screen, and enter your 25 words. You will also be asked for a restore height — this is an optional block number that tells the wallet how far back to scan the blockchain for your transactions. If you know approximately when you first created the wallet, entering that approximate date or block number reduces the scan time significantly; if unsure, leave it at 0 to scan the full blockchain. Once the scan completes, your full balance will reappear. The practical implication is that your seed phrase should be stored offline, in a location separate from your computer and wallet files, and ideally in more than one secure location. Common misunderstanding: some users believe the wallet password can be used to restore a wallet — it cannot. The password only decrypts the local wallet file. Only the seed phrase can regenerate your wallet from scratch.
Do I need to specify a payment ID when sending Monero?
In almost all cases, no. Payment IDs were a legacy feature used by some exchanges and services to identify incoming deposits. They have been deprecated in favor of subaddresses, which are unique receiving addresses that embed the same identification without any separate field. Most exchanges and services now provide a subaddress (an address starting with "8") for deposits, making a payment ID unnecessary. The practical implication is that if you are sending to an address starting with "4" and the recipient asks for a payment ID, ask them to provide a subaddress instead — this is the modern, privacy-preserving standard. Common misunderstanding: some users assume that omitting a payment ID will cause their funds to be lost. For subaddress recipients, no payment ID is needed and omitting one is correct. For the rare legacy case where a service still requires a payment ID, the GUI wallet (in Advanced Mode) does still support it.
How long does the initial blockchain sync take?
On first launch in Advanced Mode or Simple Bootstrap Mode, the Monero daemon must download and verify the full Monero blockchain, which currently exceeds 200 GB (or approximately 70 GB with pruning enabled). On a modern computer with a fast internet connection (100 Mbps or higher), the sync typically takes between one and three days. On a slower connection or older hardware, it may take longer. The practical implication is that you should start the sync when you do not need to use the wallet urgently, and ensure your device will remain powered on during the process. Common misunderstanding: some users expect to sync in a few hours, as with Bitcoin. Monero's privacy mechanisms require additional computational work per block, which makes the initial sync longer. See our guide on speeding up the initial blockchain sync for specific techniques.
 monero.how