Coinbase is yet to add Monero support,
however you can still use their services to facilitate its
acquisition. The
first part of this guide details how to register and verify at Coinbase, and how to
quickly and easily buy cryptocurrency through it. The
second part of the guide show you how to set up
a Poloniex account, transfer cryptocurrency from Coinbase to Poloniex, and then trade that cryptocurrency
for Monero. Our
How to Buy Monero using Binance guide can teach you to use
Binance rather than Polinex if you prefer to do so.
Because there is still a lack of exchanges where you can cheaply buy Monero with USD, EUR, or any other
major fiat currency, using one exchange as a fiat on-ramp, and another to trade for Monero is considered
to be cheap and effective.
Remember, you can buy Monero with USD and EUR directly from two large and reputable exchanges - Bitfinex
and Kraken. So make sure you first check to see if your local exchange sells Monero. There is also
LocalMonero which is similar to Local Bitcoins in which
it acts as an escrow service, and you can pay for your Monero with fiat currency in person or online. Visit our
How to Buy Monero Using LocalMonero guide for more information.
Also, if you are in a country like Australia, while you can buy Monero directly with AUD from an exchange
such as Coinspot, it is still cheaper to purchase a cryptocurrency such as Litecoin from an exchange
with lower fees, and then trade it for Monero on a second exchange such as
Poloniex,
Binance or
Exmo.
The run down of money from your bank to Monero is as follows:
BUY LITECOIN ON COINBASE → SEND LITECOIN TO POLONIEX → TRADE LITECOIN FOR MONERO
While I’m aware Coinbase’s fees aren’t the cheapest, this guide can be adapted for other exchanges.
For example, you could buy your cryptocurrency at GDAX or Bitstamp, and then use the second part of this
guide to help you convert to Monero.
More on the reason why we use Litecoin in this guide can be found in
Step 10.
Step 1.
Go to
Coinbase. You will be greeted with
the coinbase homepage.
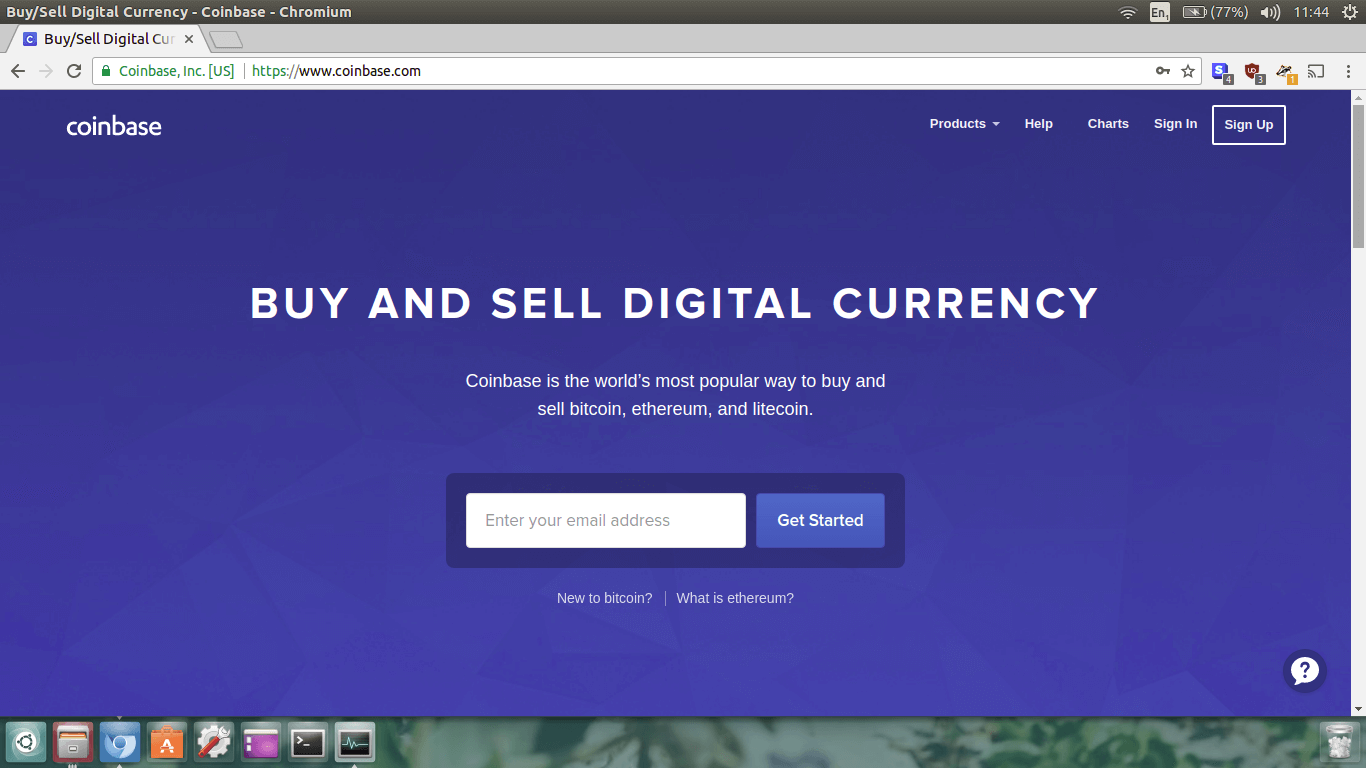
Now, type in your email address where it says
Enter your email address and click
Get Started.
Step 2.
You will now be directed to the page titled
Create your account.
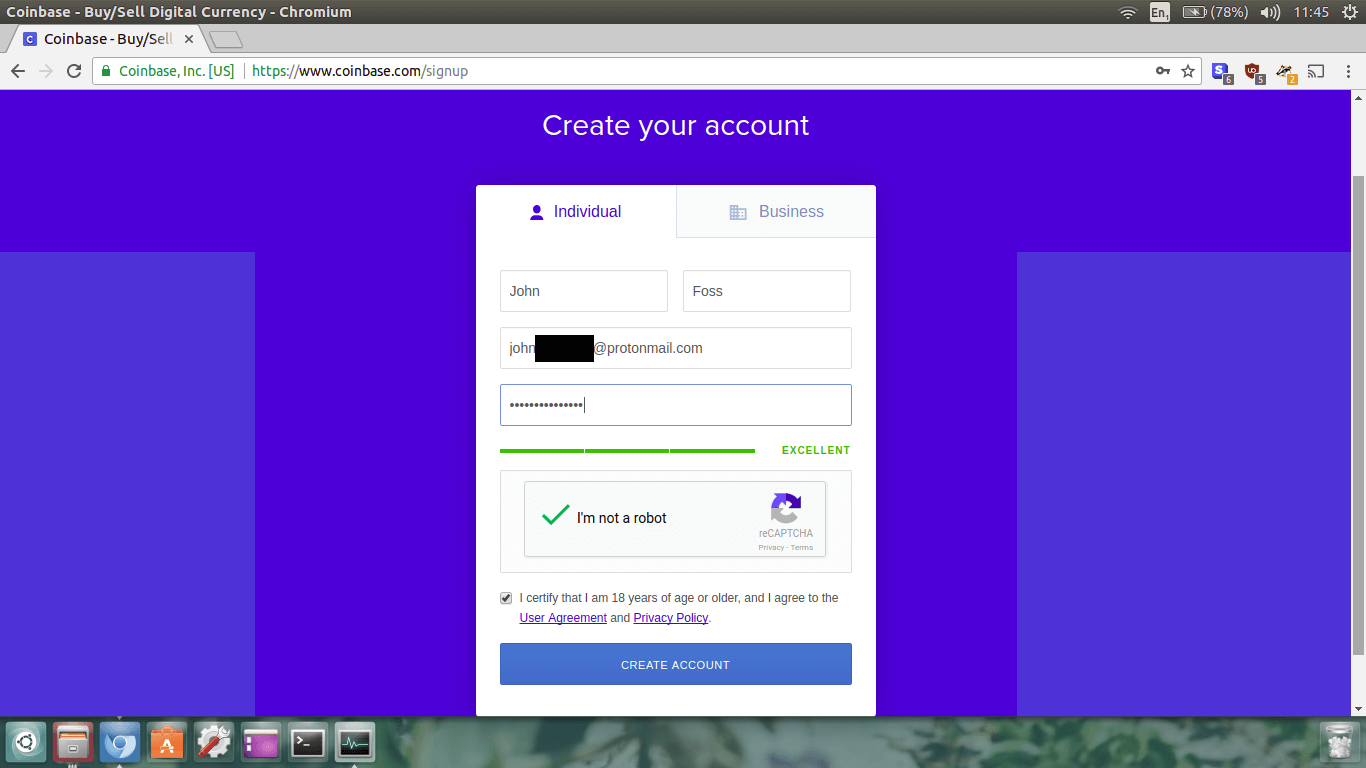
As you are just a person, leave the tab on
Individual.
Then enter in your name, make sure your email address is correct, create a password, then check the
I’m not a robot box, and the certification box. Click
Create Account.
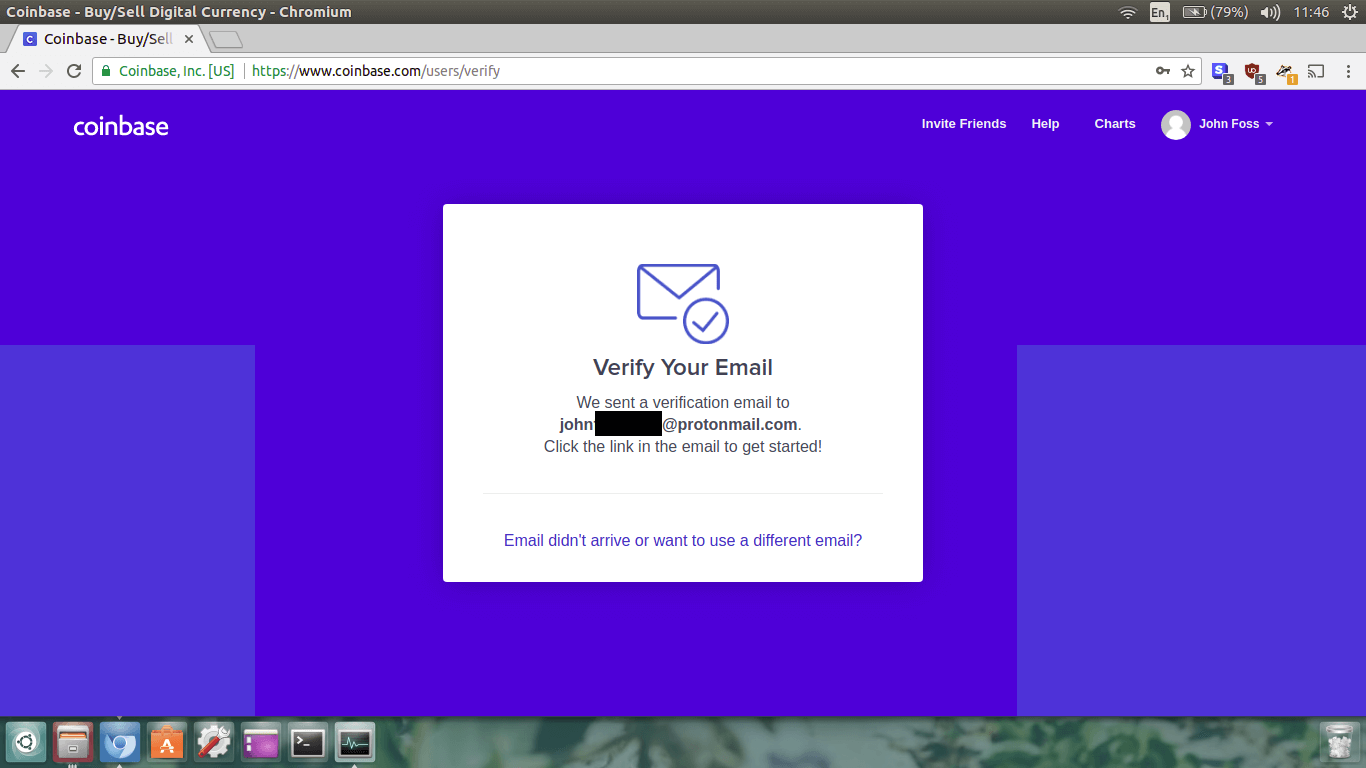
Step 3.
You will now see the email verification page. Good job! Time to verify your email!
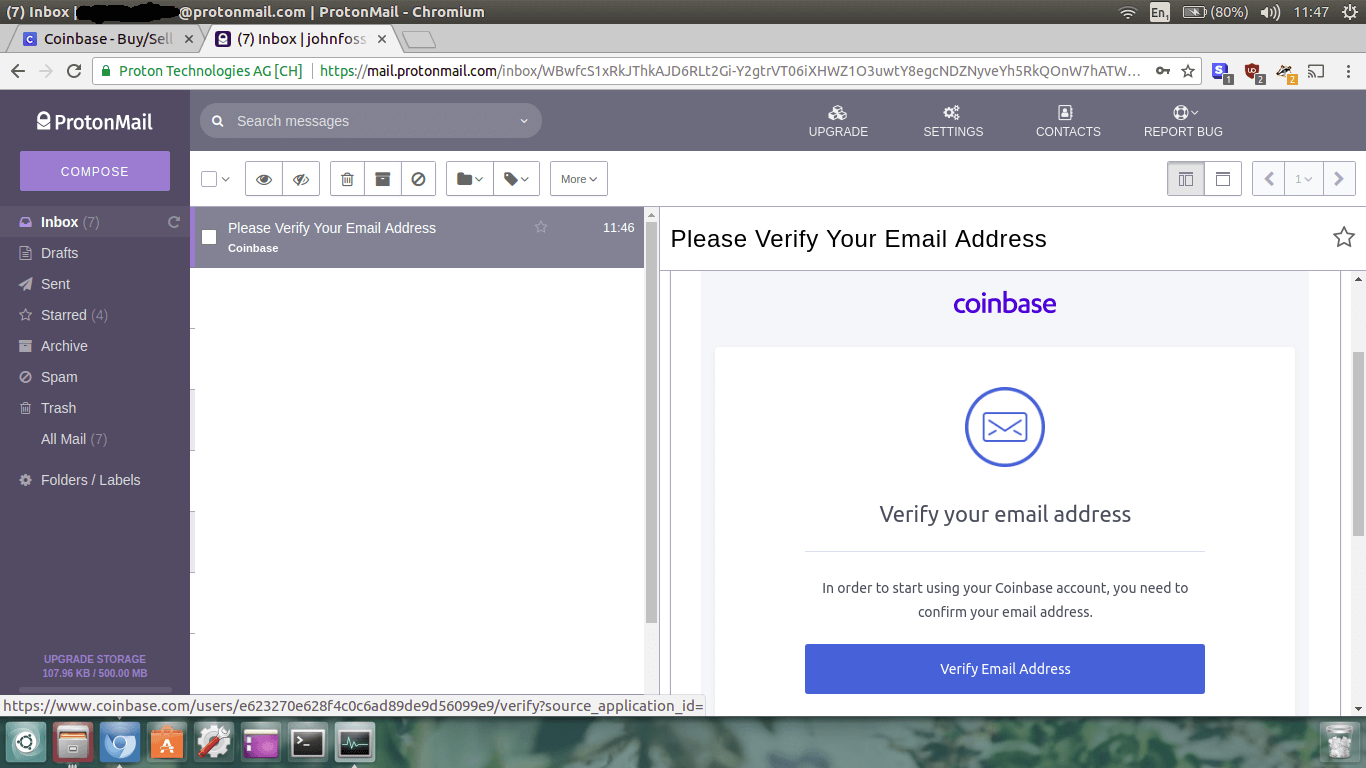
Step 4.
It is now time to go to your personal email account and click big blue button
Verify Email Address.
Step 5.
After clicking the link in your email, you will be greeted with the page below. It should automatically
load up in your browser.

Now you need to link your personal phone number. Make sure you use your own number, and not your dog’s
or a fake one. Choose your country, calling code, type in your phone number, and then click
Next.
Step 6.
In this step you need to verify your phone, just like you did with your email. Coinbase will send you a
text message with a 6 digit verification code. Once you get the message, type the verification code
from your phone into the website, and click
Verify Phone Number.

Step 7.
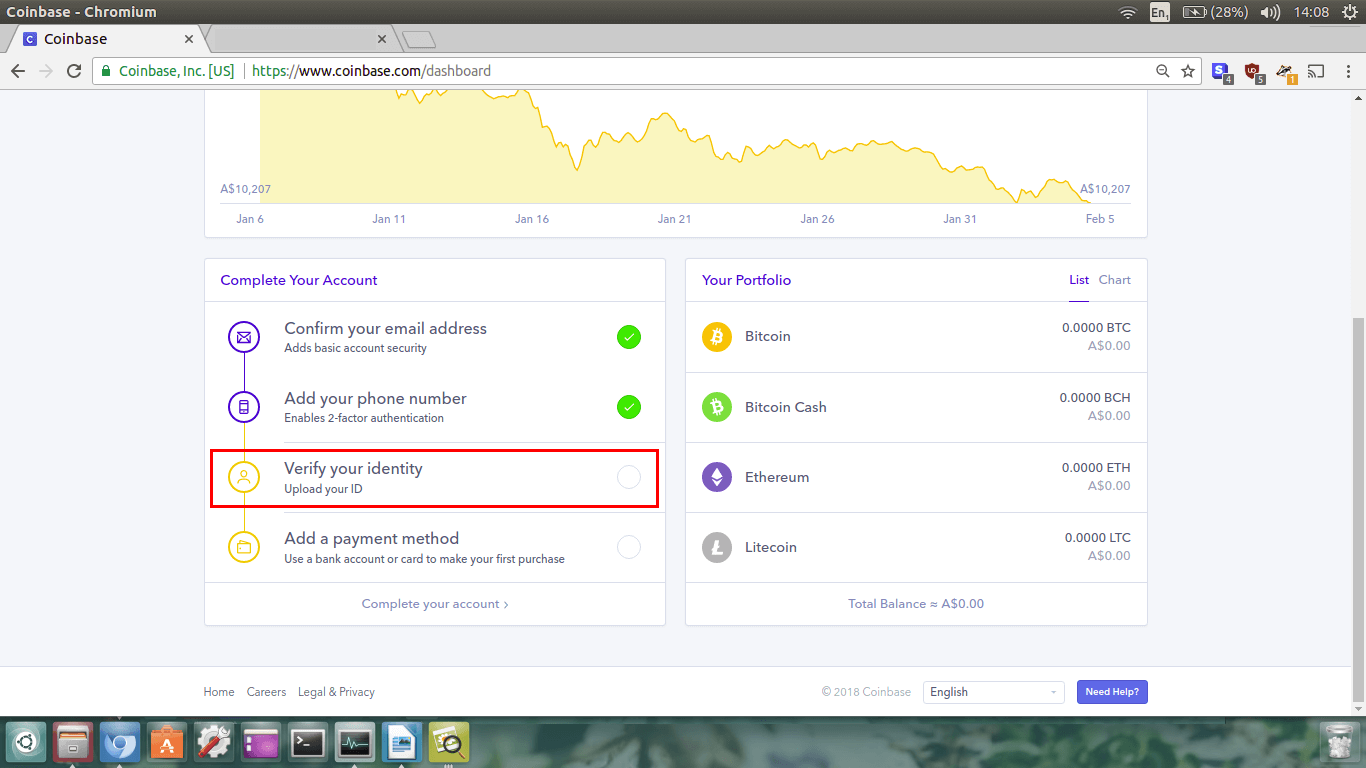
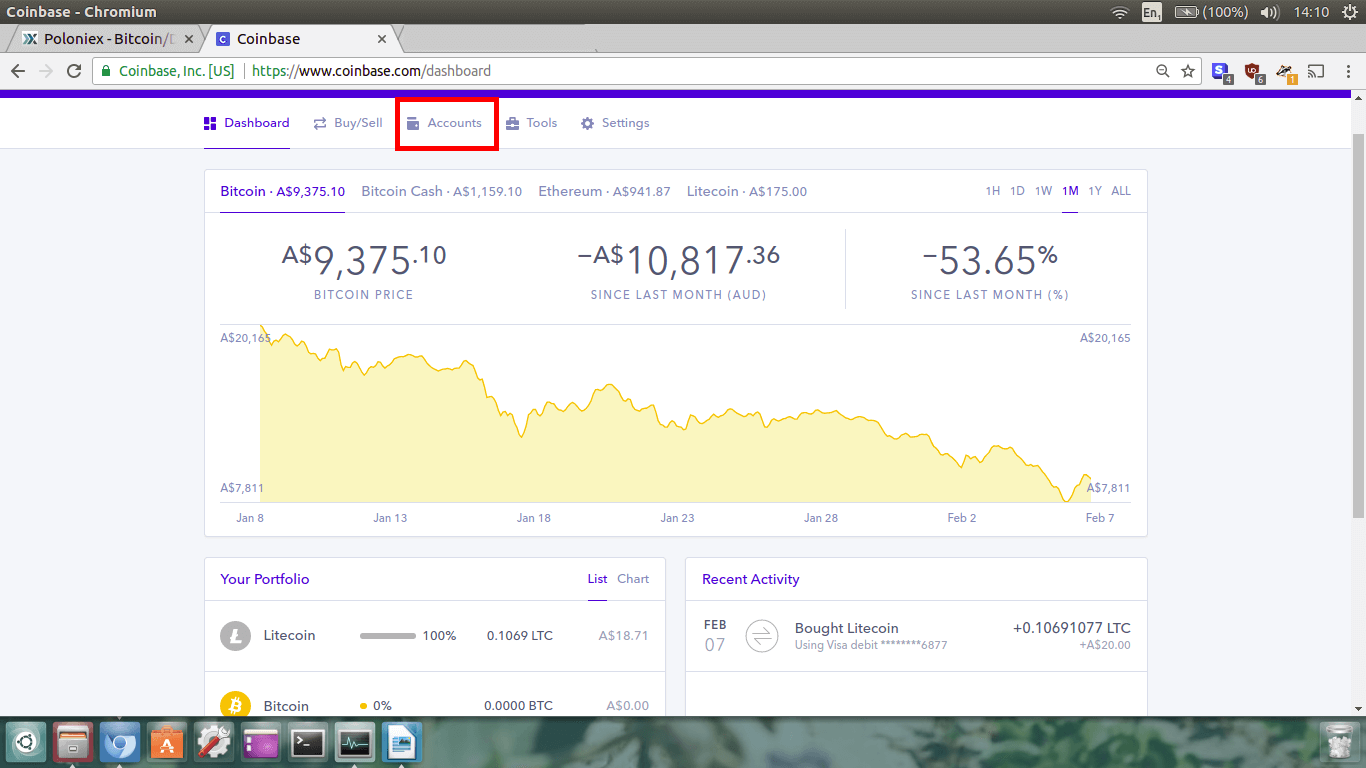
Awesome! You’re all sorted for now. The next screen you will see is your Dashboard. You now need to
verify your ID.
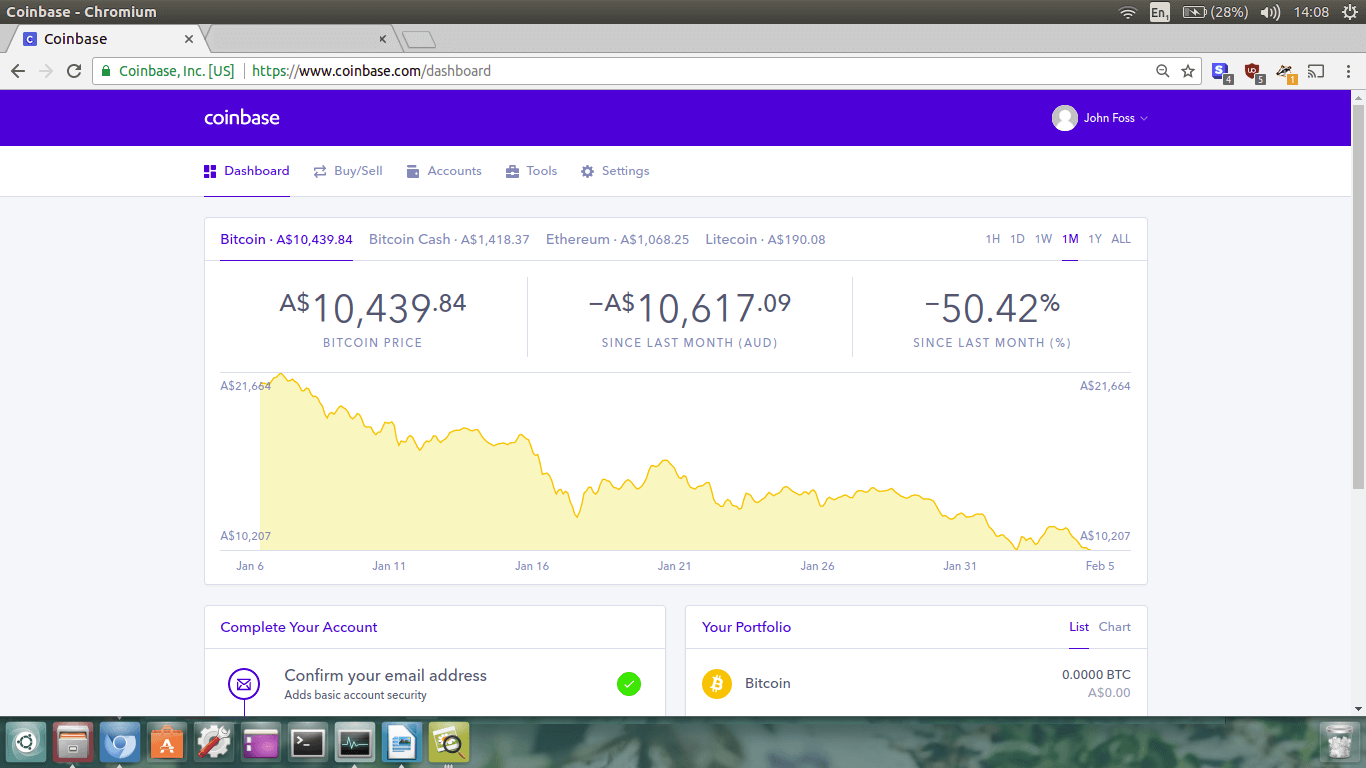
Scroll down to where it says
Verify your identity and click it.
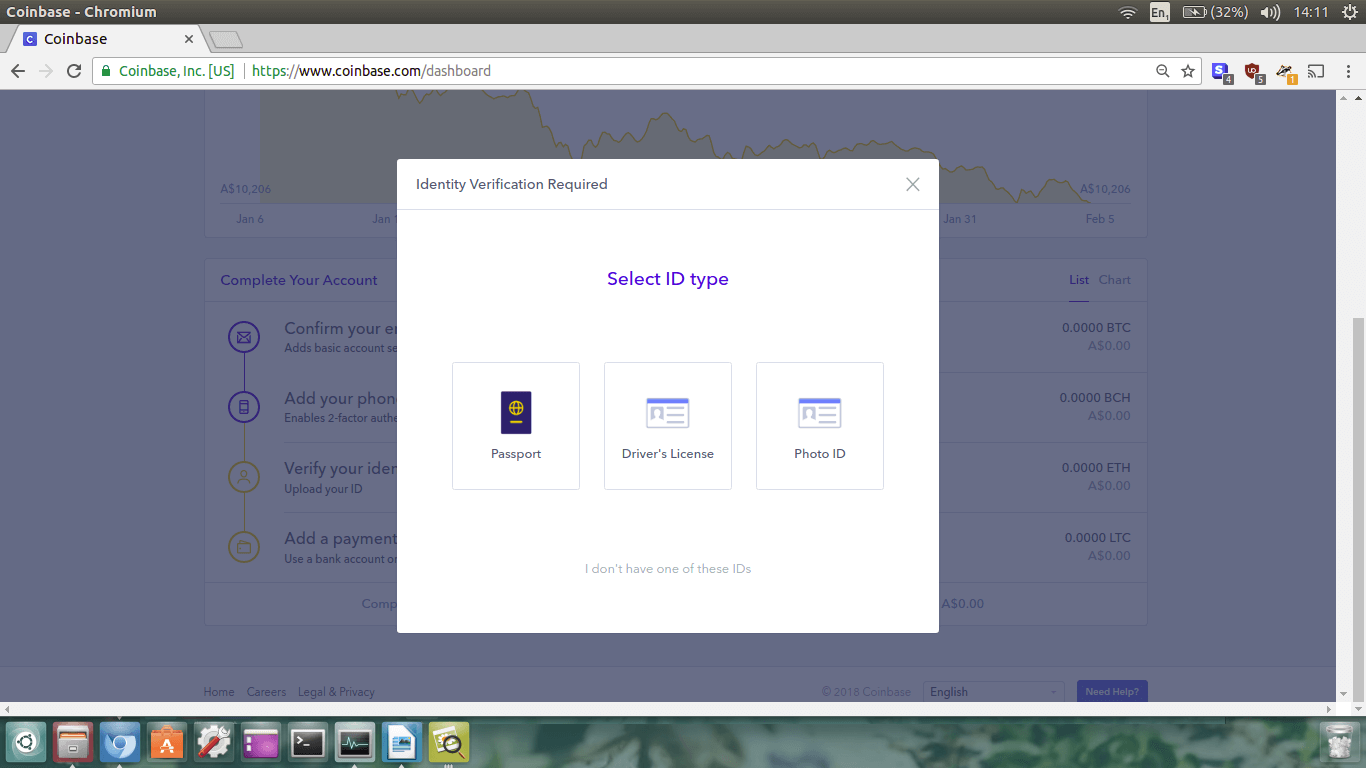
Step 8.
Select your ID type. For myself, I’m going to use my passport, but you can use whatever is convenient.
It will now come up with a method of upload screen. I’m going to choose
Mobile Camera.

Coinbase will then send you a text message to your phone with a link inside. Open the text message,
click the link, and then upload your photo of the document. Don’t close the browser on your PC.
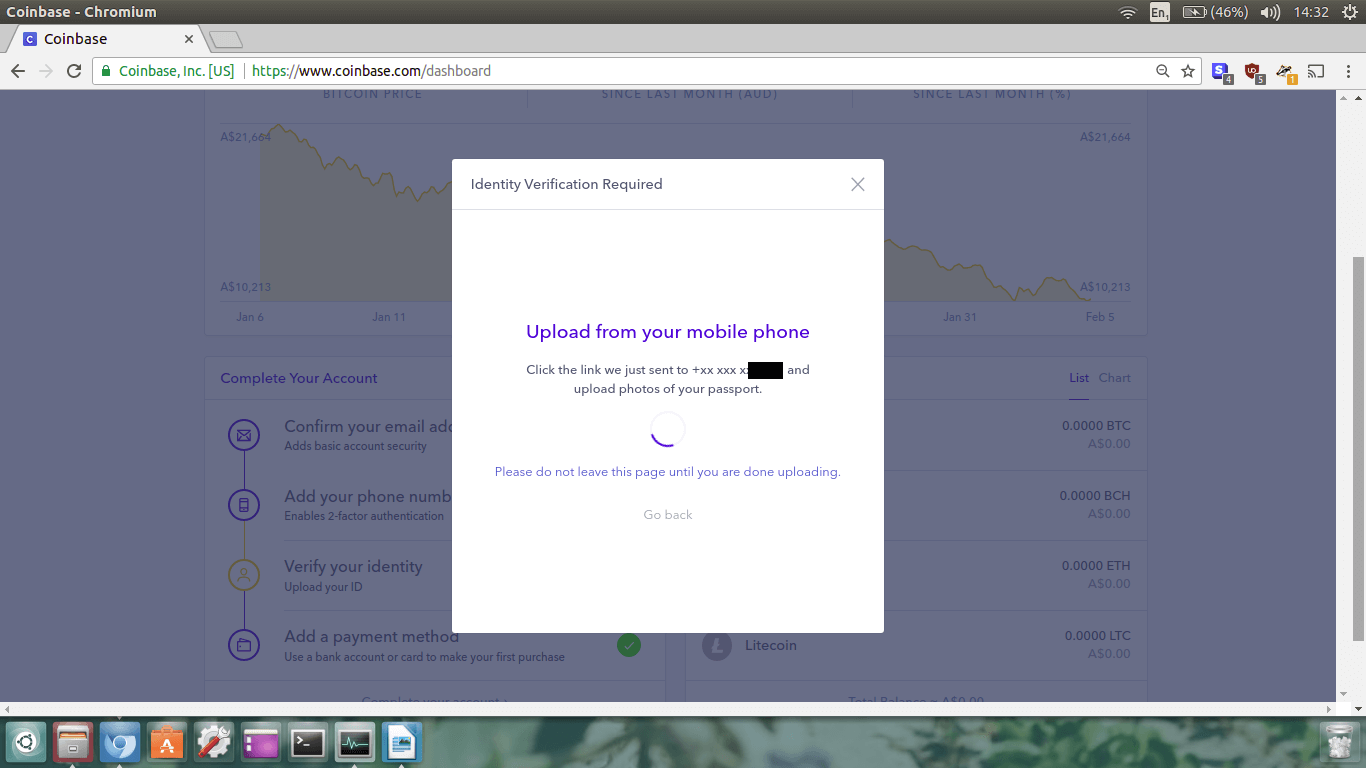
Once you’ve uploaded the image of your ID document, the screen will change. Let it finish doing its thing.
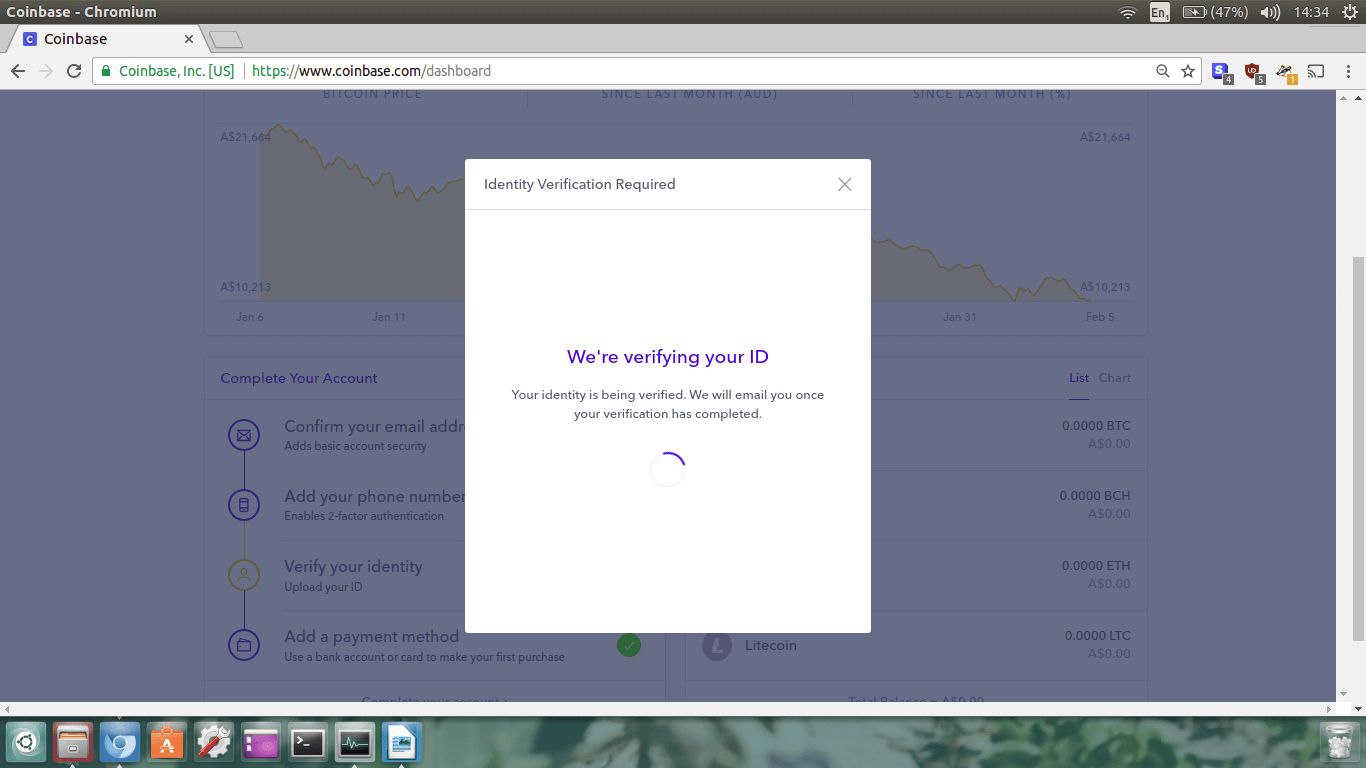
When it is all finished you will see the ID verified screen on your PC.
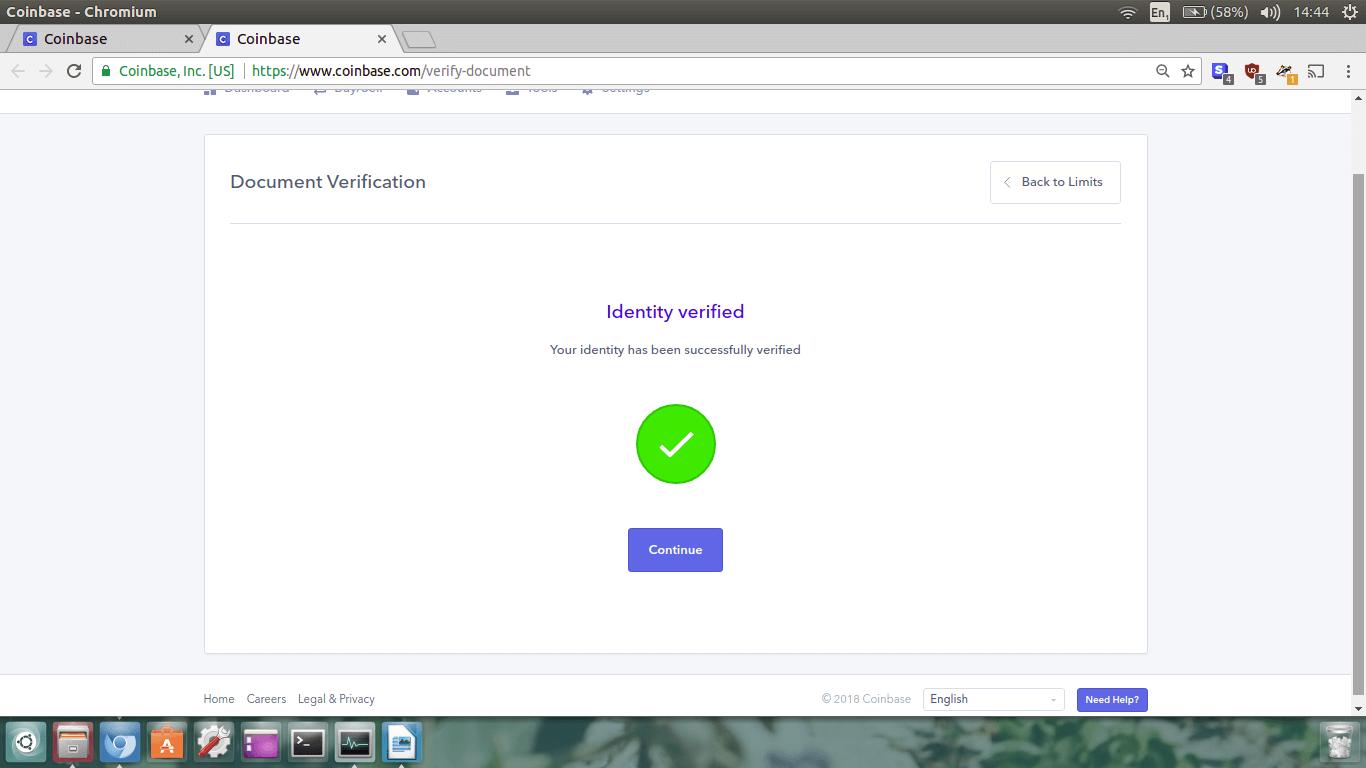
Good job! Click continue. You are now verified and ready to deposit some money.
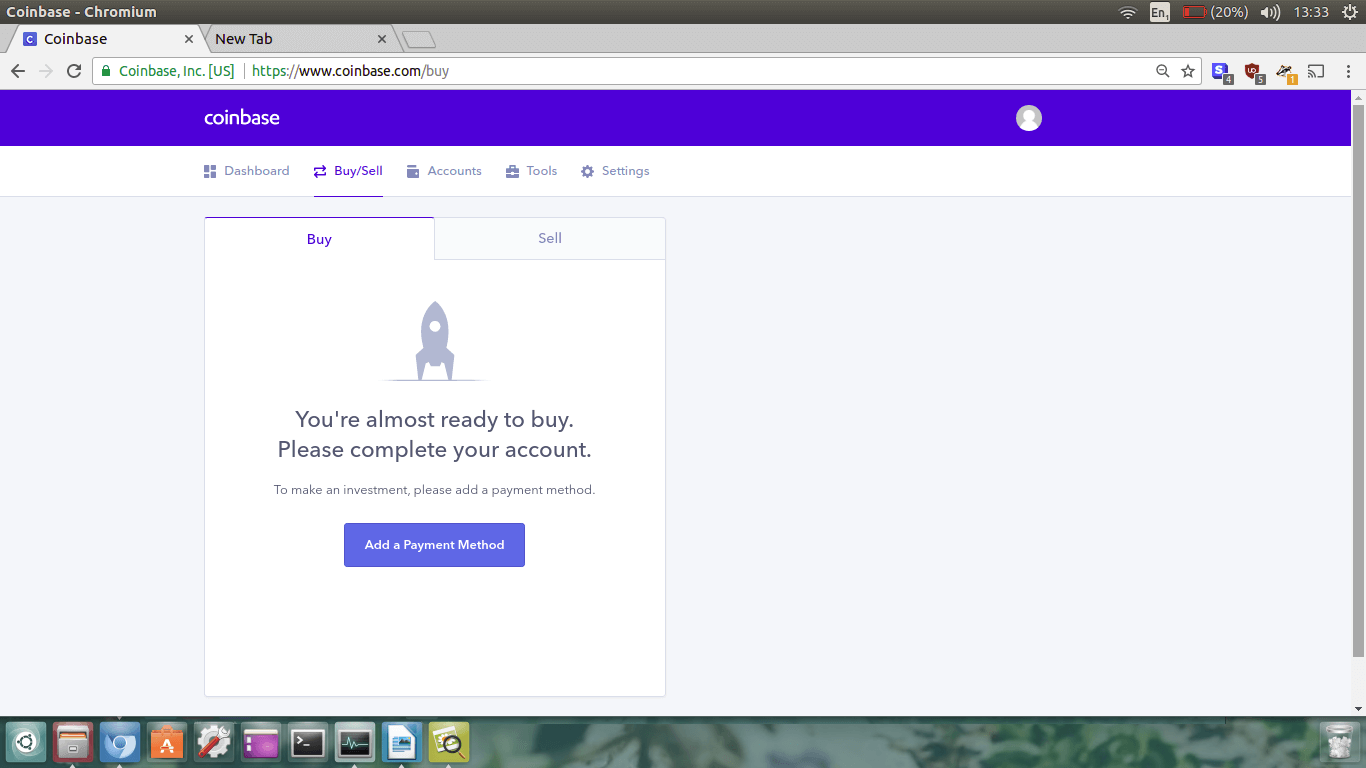
Step 9.
On your Dashboard, click
Add a payment method.

You will then end up on the screen shown below. Under the
Buy tab,
click the blue
Add a Payment Method button.
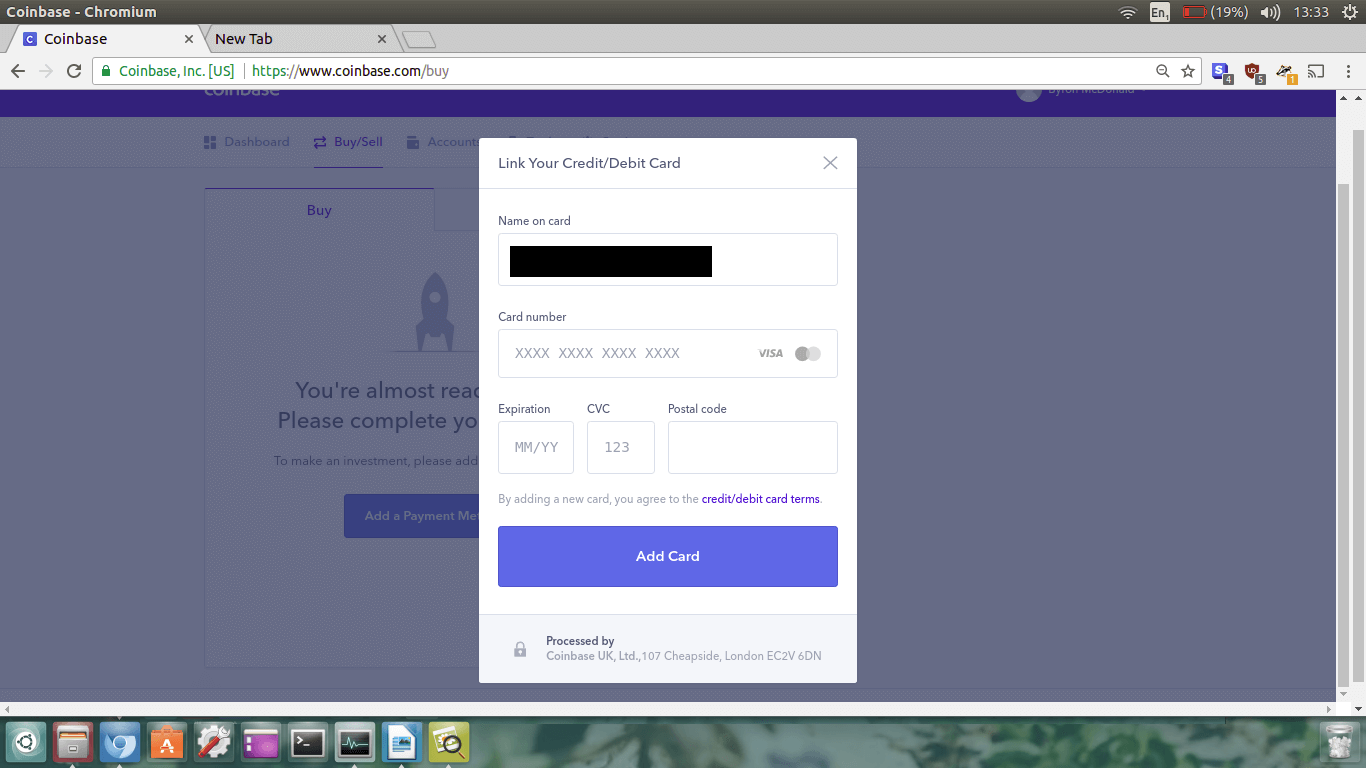
Now you have to add your payment method. Because I’m from Australia, I can only add a Credit/Debit Card.
If you are from the US I think you can bank transfer money across, as well as a couple of other different
options if I remember correctly.
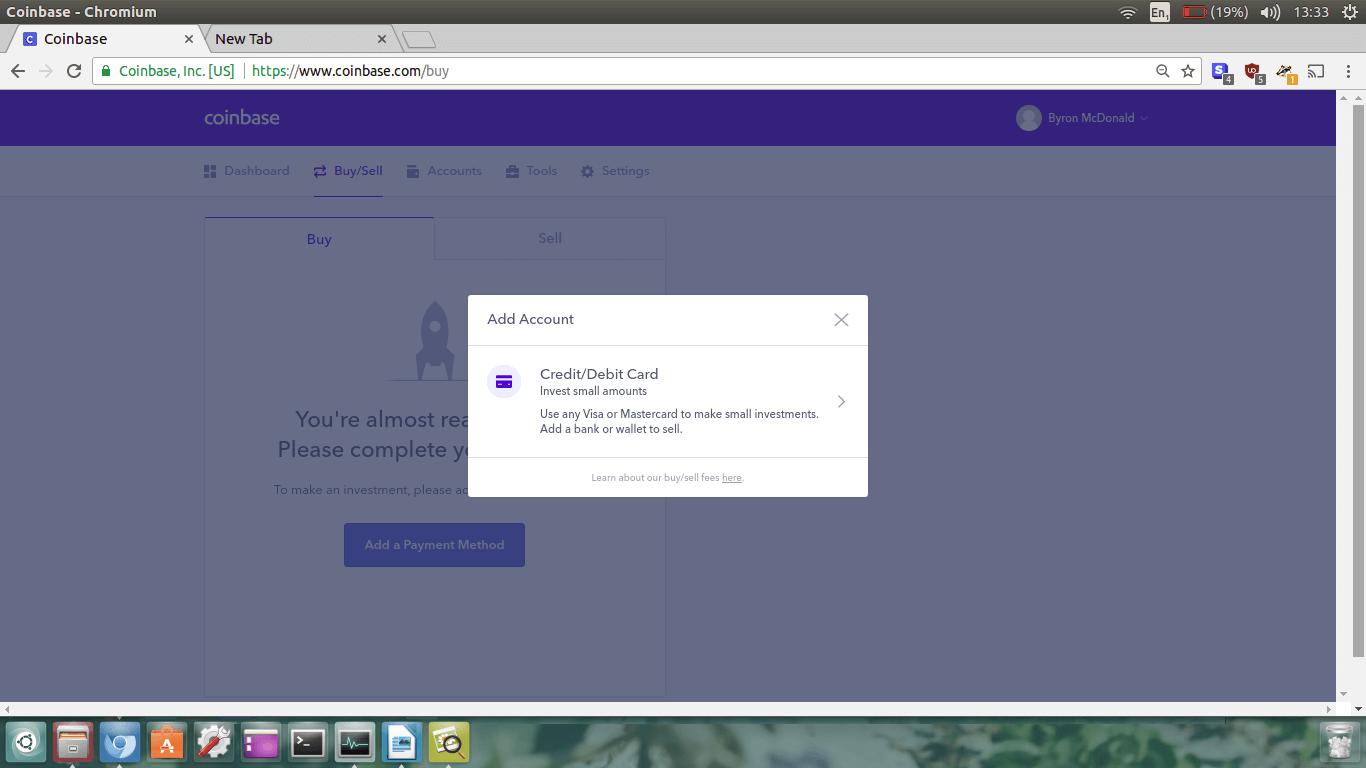
Add in your credit/debit card details and then click
Add Card.
Great. Now, in order for Coinbase to confirm you control your bank account, you need to enter some
verification numbers in.
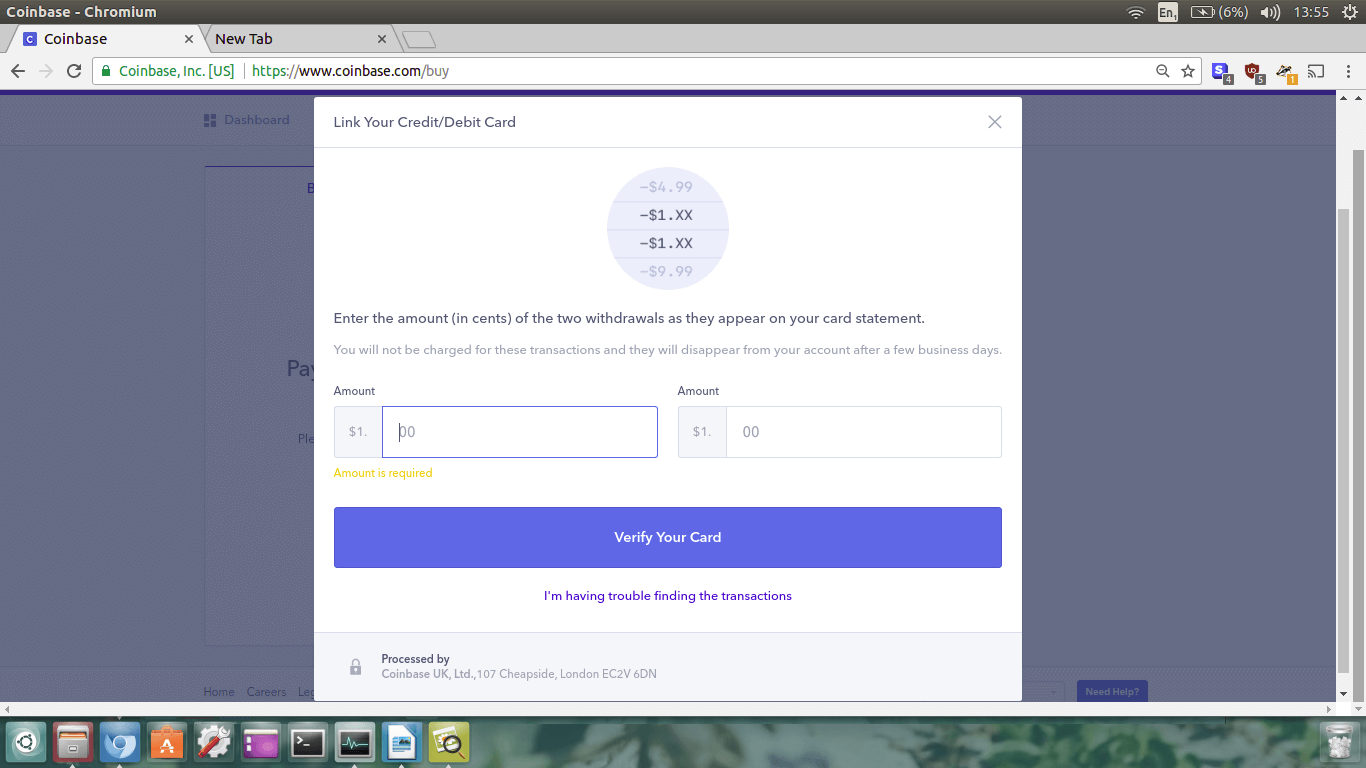
Coinbase will conduct two withdrawals between $1 and $2 from your credit/debit card. What you need to
do is login to your bank account, find the transactions, and enter the
cents amount from the two transactions into the two boxes on the Coinbase website.
For example, $1.
71 and and $1.
45.
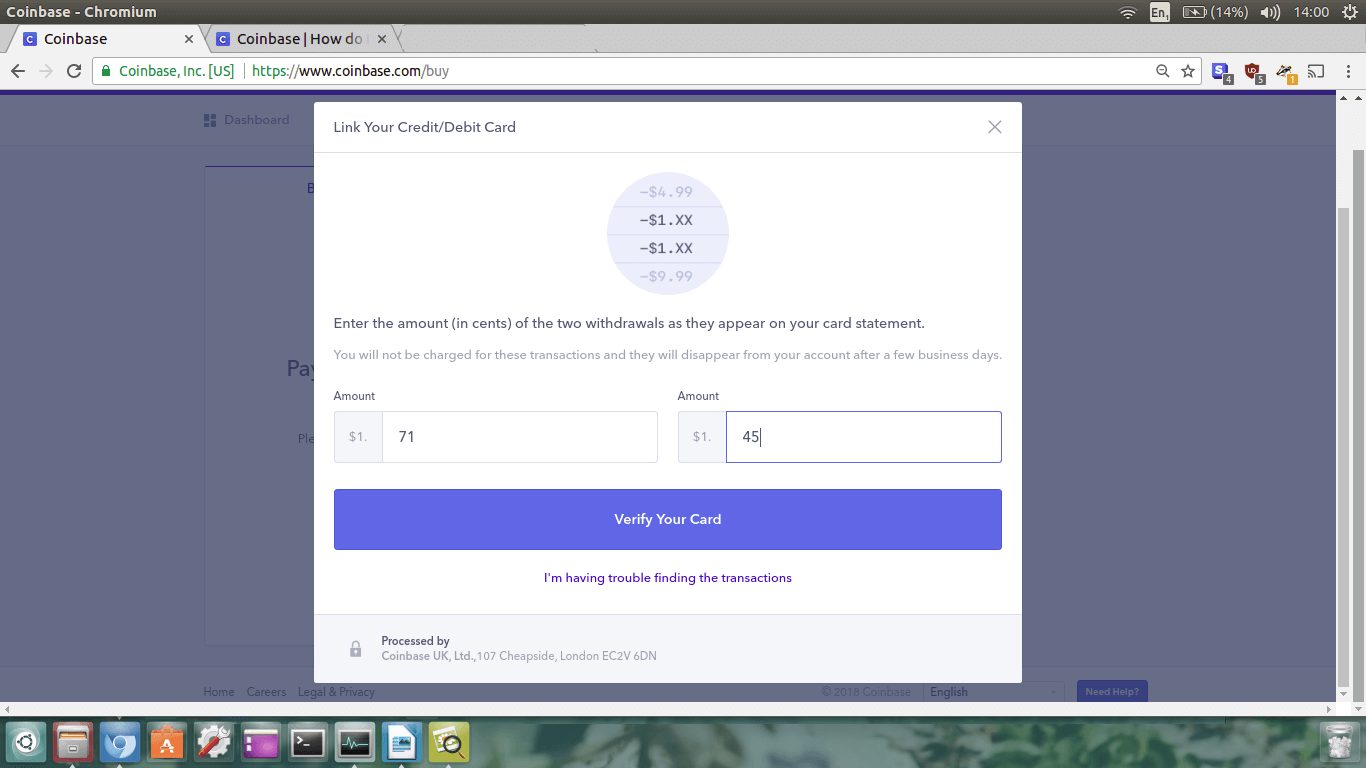
When you’ve entered them in click
Verify Your Card.
You will then see a green box saying
Credit card successfully verified!
Well done! We’re now ready to buy some cryptocurrency at Coinbase, so we can send it to the Poloniex exchange and trade it for Monero.
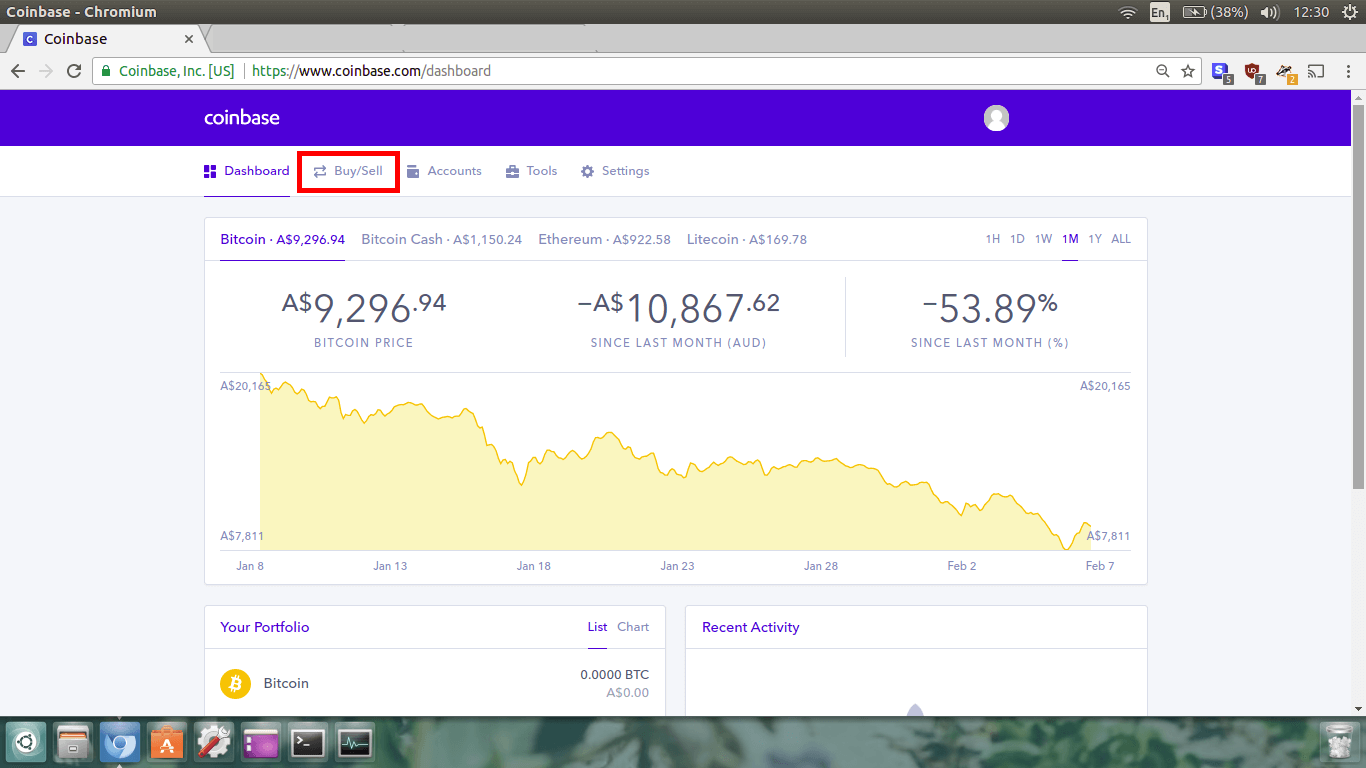
Make sure you’re back on your Dashboard. Click
Buy/Sell.
You will end up on the Buy/Sell page. This is where you can make the order.
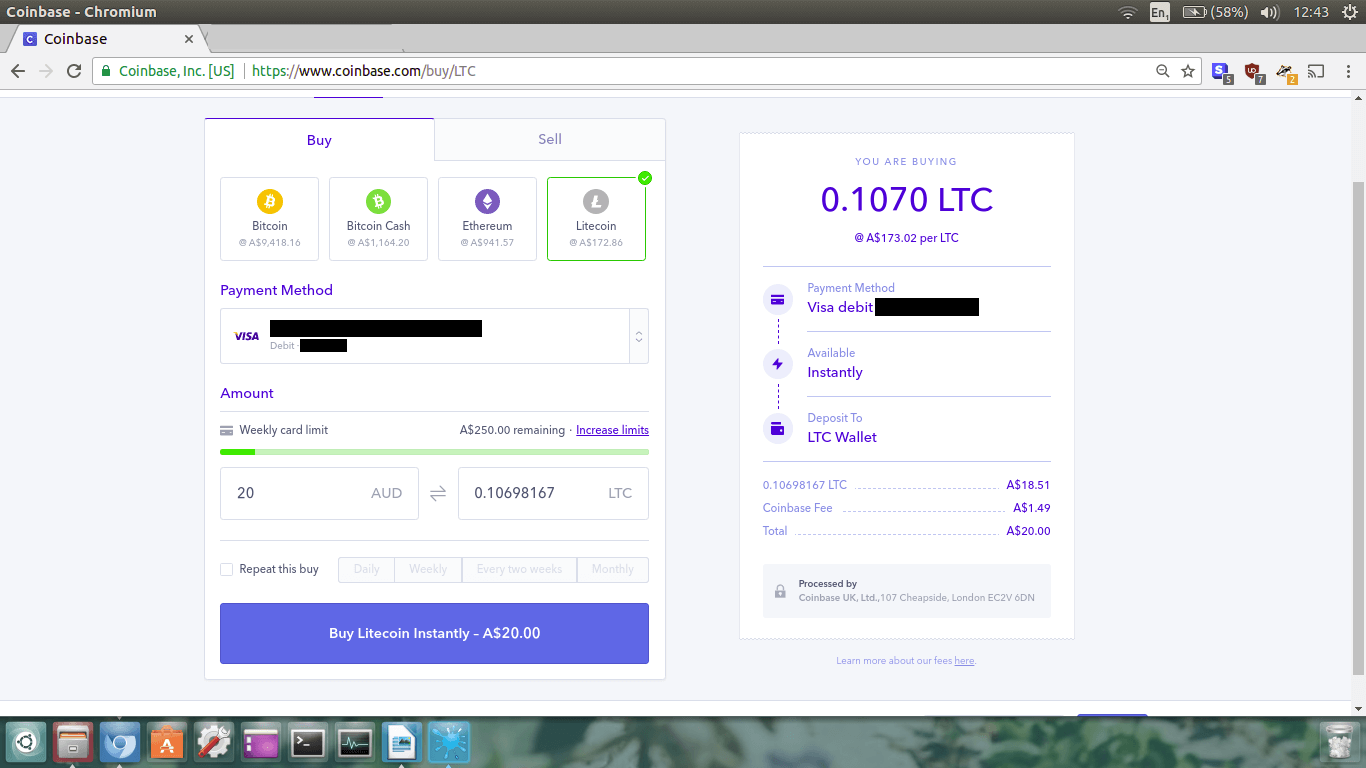
As you can see in the image above, the first thing I did was to choose the cryptocurrency I want.
Because of the lower fees and fast transaction times Litecoin provides, we are going to use it.
Make sure the Litecoin box is ticked green.
Next, choose your payment method. I have only added one payment method, so it has to be my Visa Debit.
Now enter in how much you want to buy. I am going to buy $20AUD of Litecoin.
You can look to the right to check the transaction details to make sure they are ok. Just so you know, it’s usually cheaper to buy all your crypto in one go if you want to avoid fees.
Once you’ve done that, click
Buy Litecoin Instantly. You will now be directed to the confirmation page. It restates your transaction info.
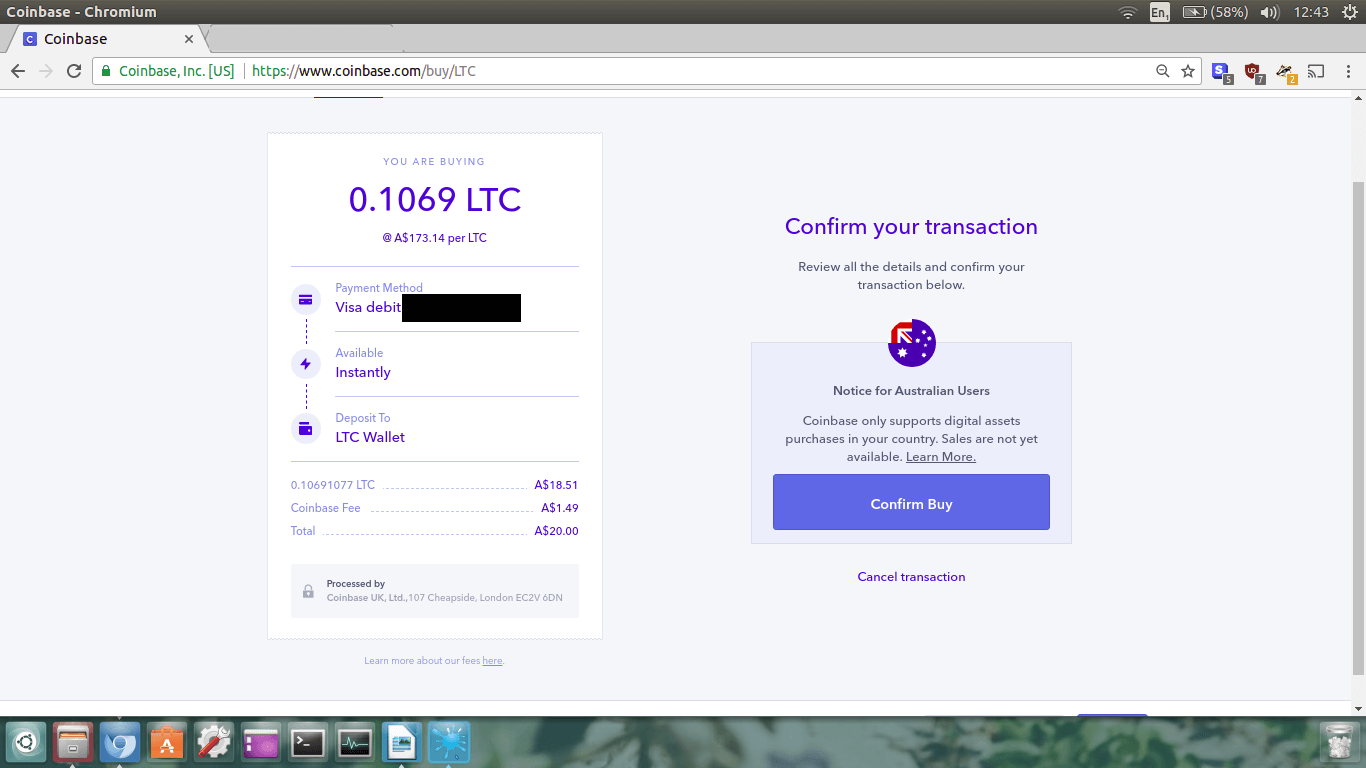
Double check all the information is correct and click
Confirm Buy.
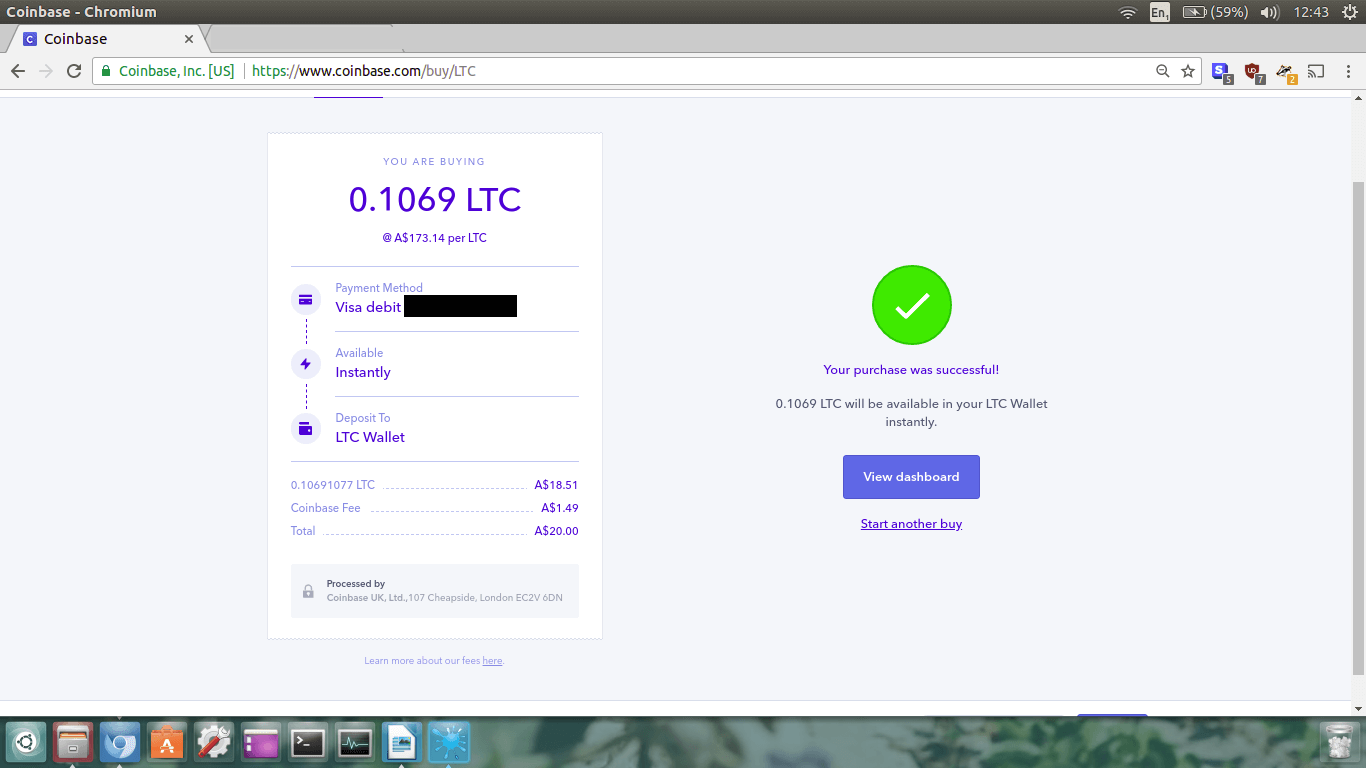 Congratulations!!! You have now bought some Litecoin!
Return to your Dashboard and you will see a breakdown of your cryptoportfolio, and your transaction history.

It is now time to set up an account over at Poloniex. We are going to send the Litecoin we bought at
Coinbase to our Litecoin Wallet at Poloniex in order to trade it for Monero.
Step 11.
Go to
Poloniex. You will see the screen below.
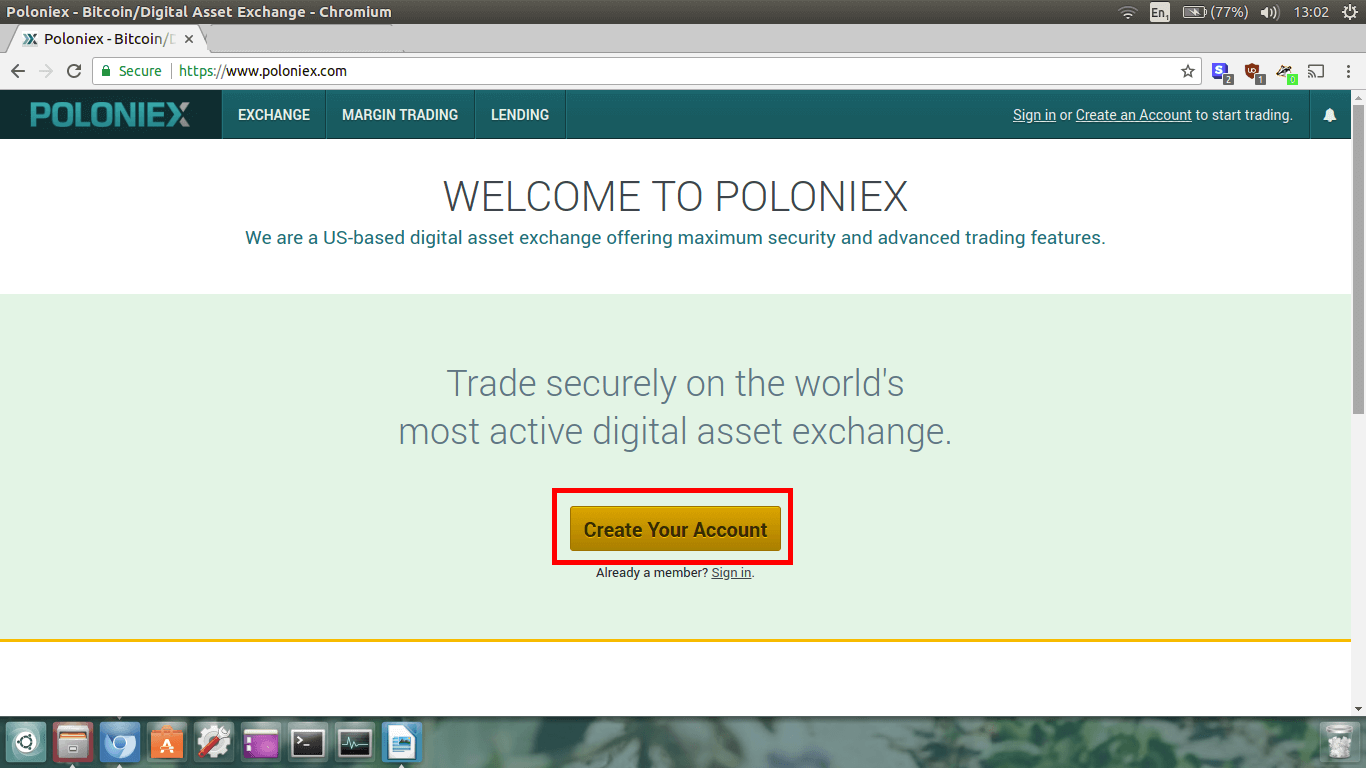
Click on
Create Your Account and you will be directed to the signup page.
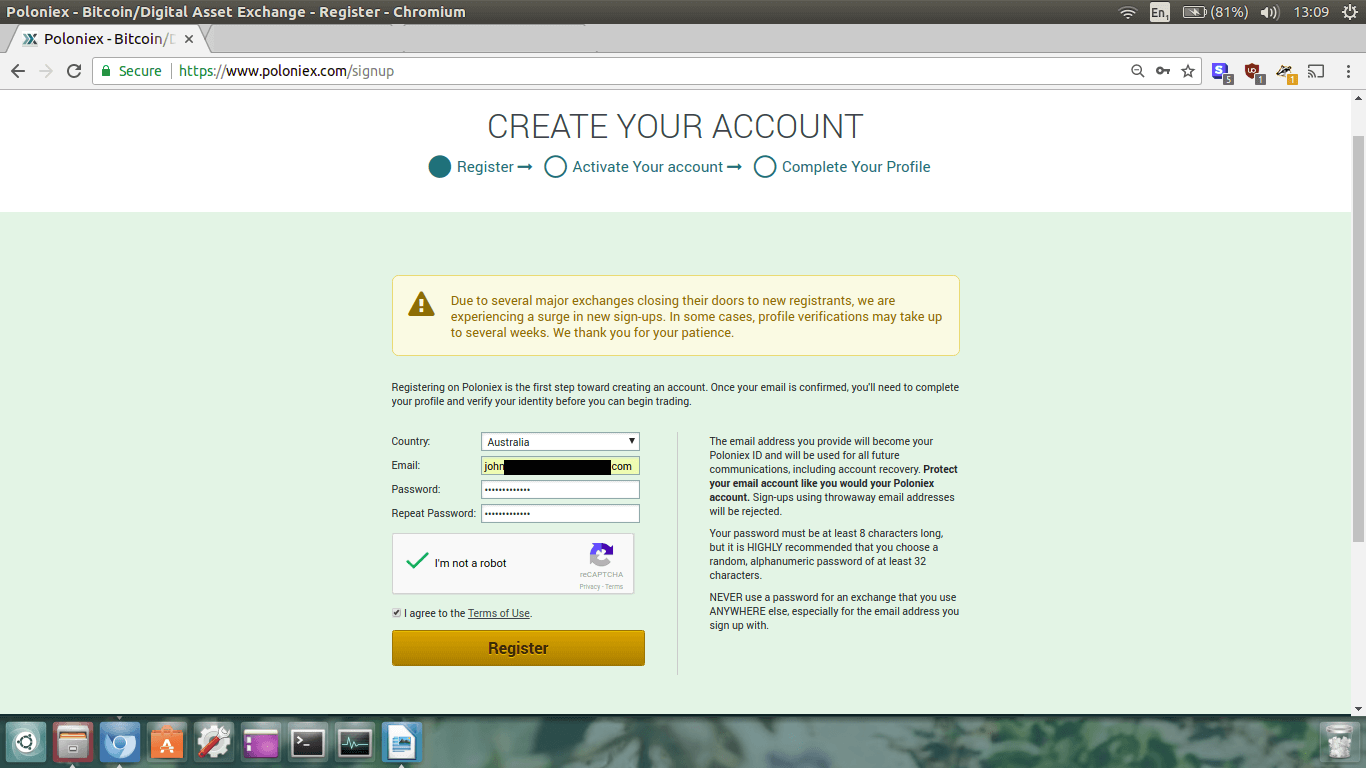
Enter all your information, click the Captcha and Terms of Use boxes, and click
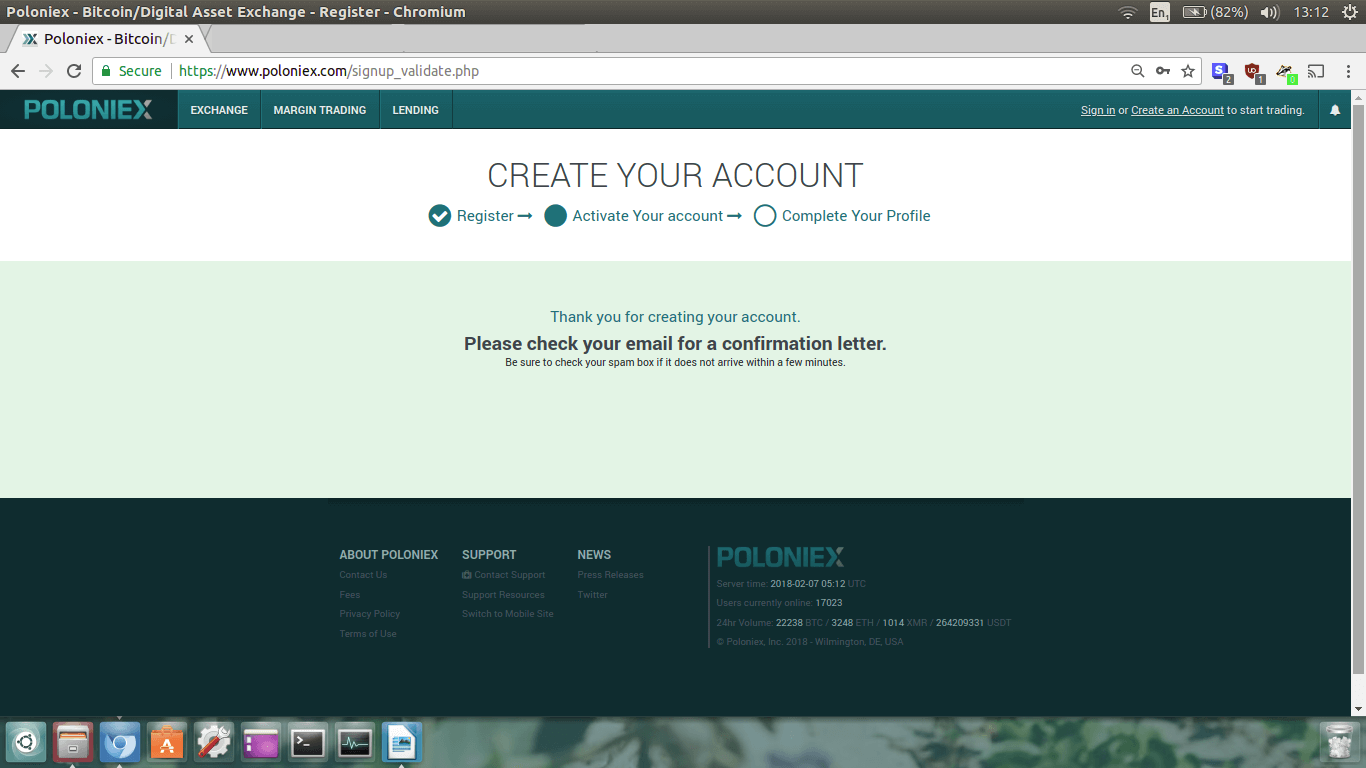
Register.
You will now be directed to the email confirmation page.
Step 12.
Login to your email account and locate the email from Poloniex.
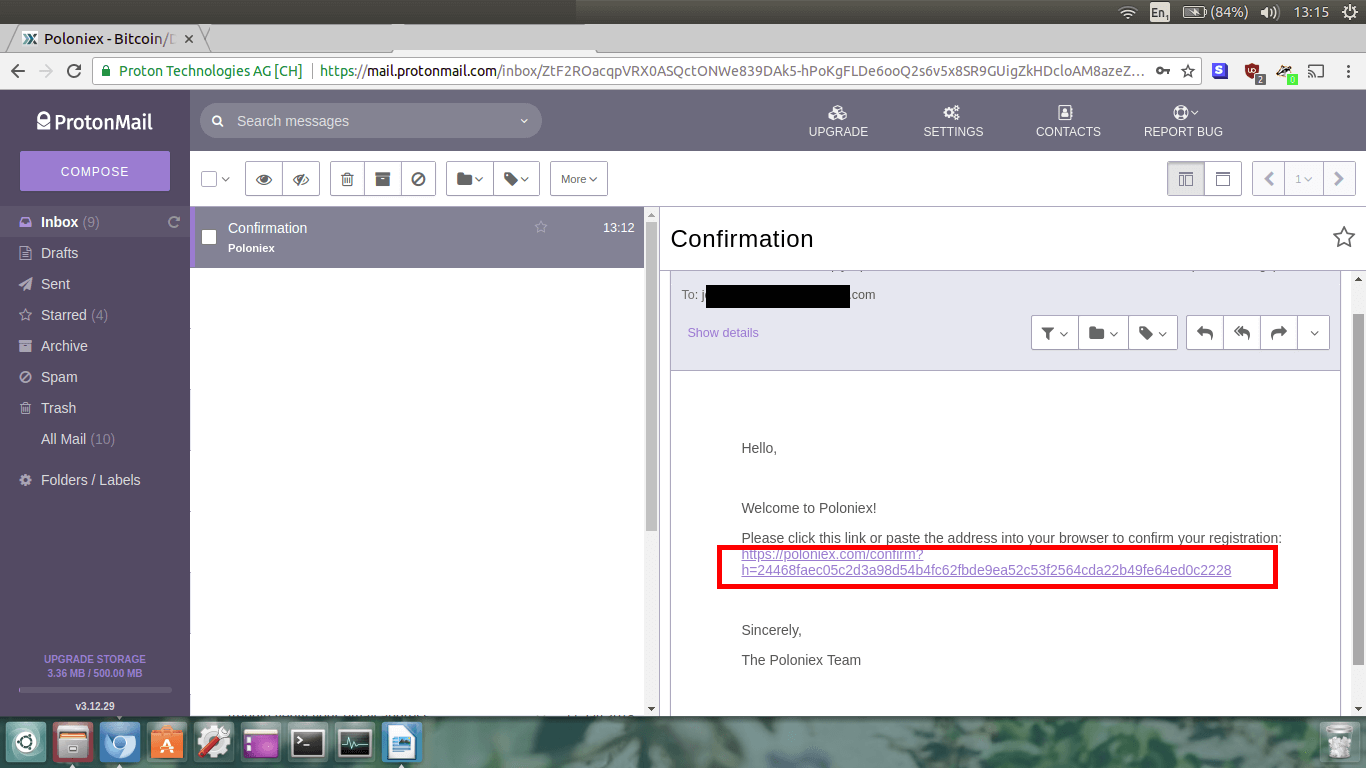
Open it, and click the email confirmation link. You will then be redirected to the Poloniex website and
see a page saying
Thank you for validating your email address.
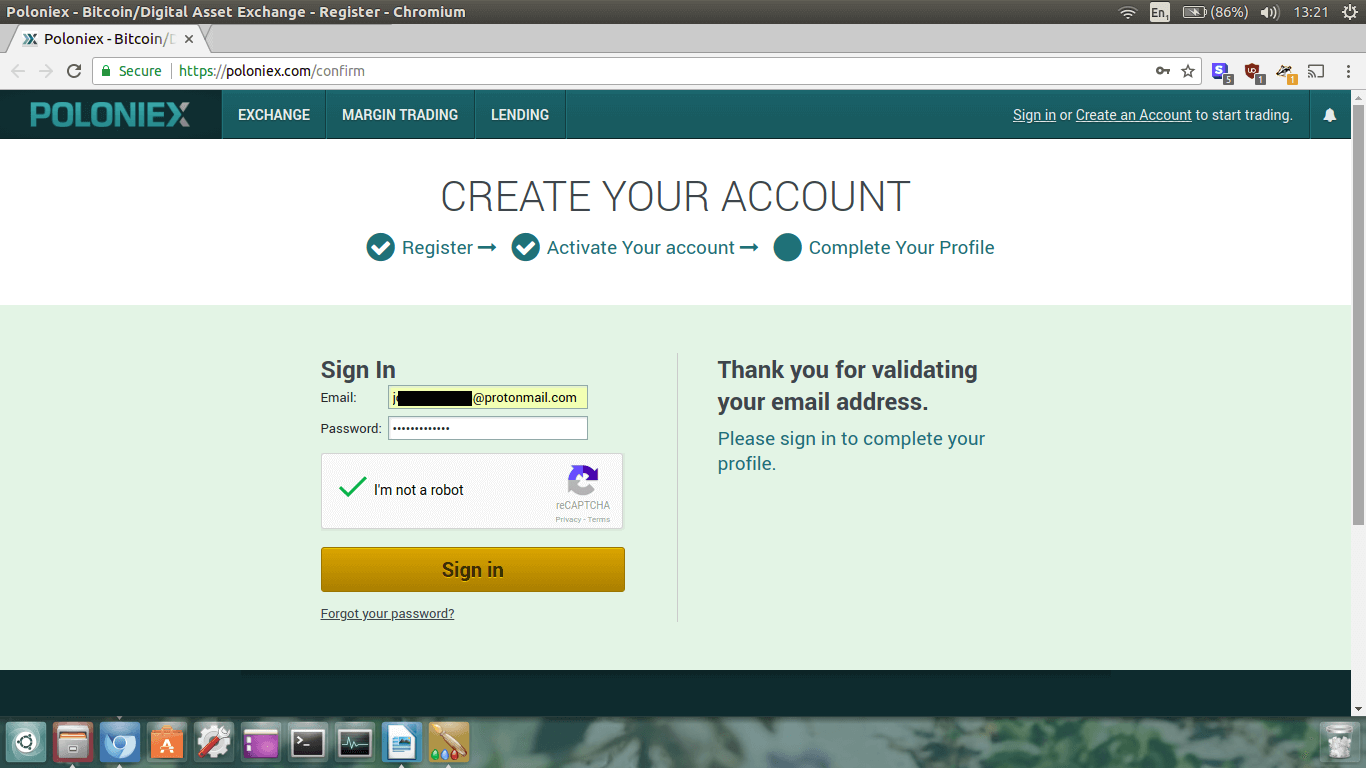
Now we’re going to login to Poloniex. On the left enter in your email address, password, and check the
Captcha box and click
Sign in.
Step 13.
NOTE: Now, because I am already verified cannot step you through the verification process one step at a
time. Complete the verification process just like you did with Coinbase. Trust me, it’s easy.
Just don't use fake information and you’ll be fine!
Once you have completed the ID verification process, we are ready to send our Litecoin from our
Coinbase wallet to our Poloniex wallet.
Important: You need to be verified in order to withdraw from Poloniex!
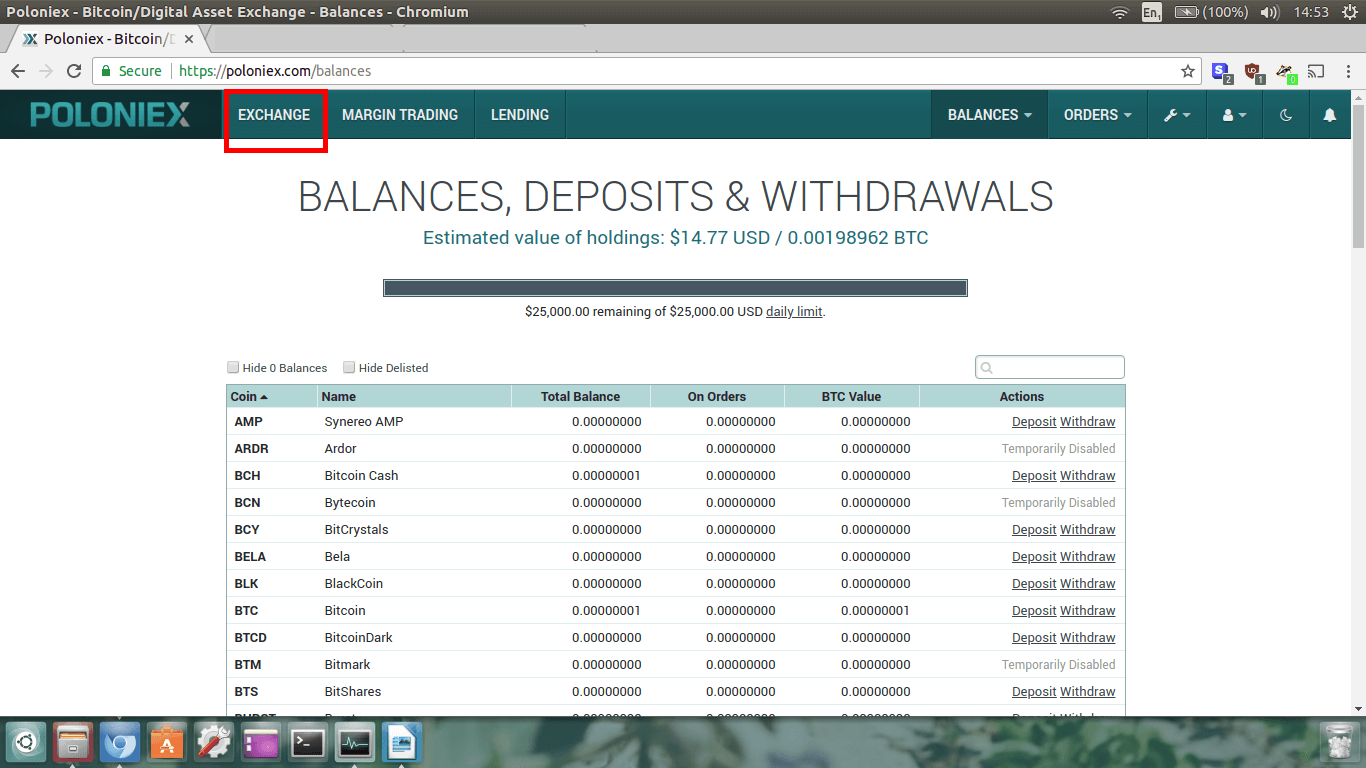
Step 14.
Click
Balances and then click
Deposits and Withdrawals.
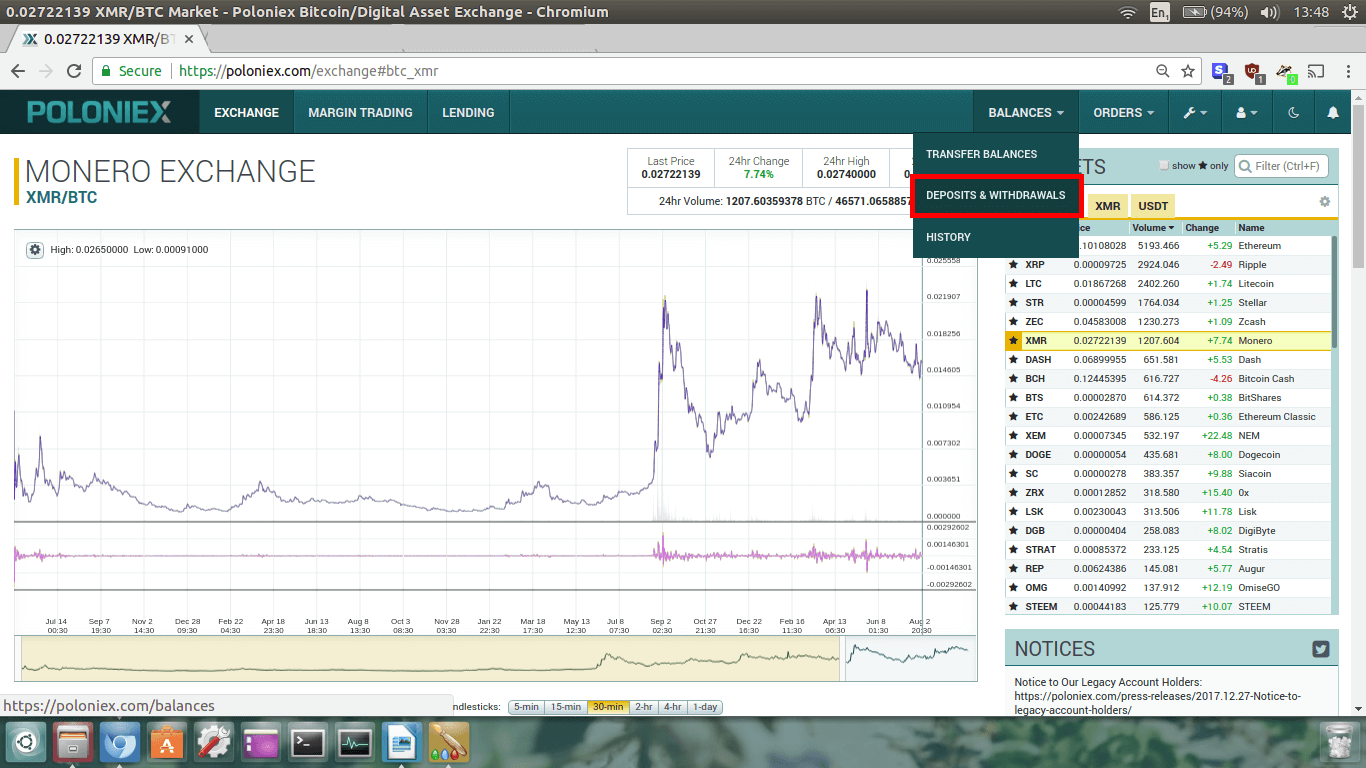
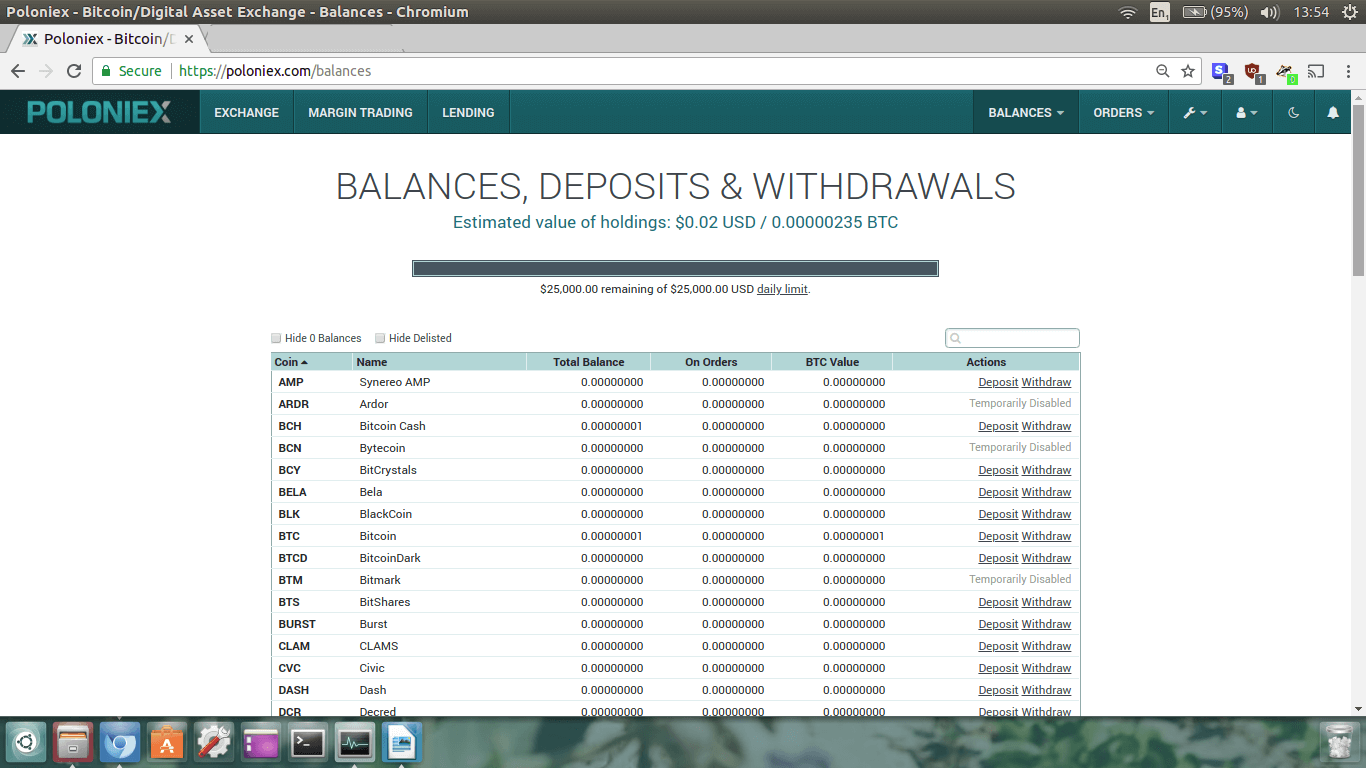
It will then direct you to the
Balances, Deposits, and Withdrawals page.
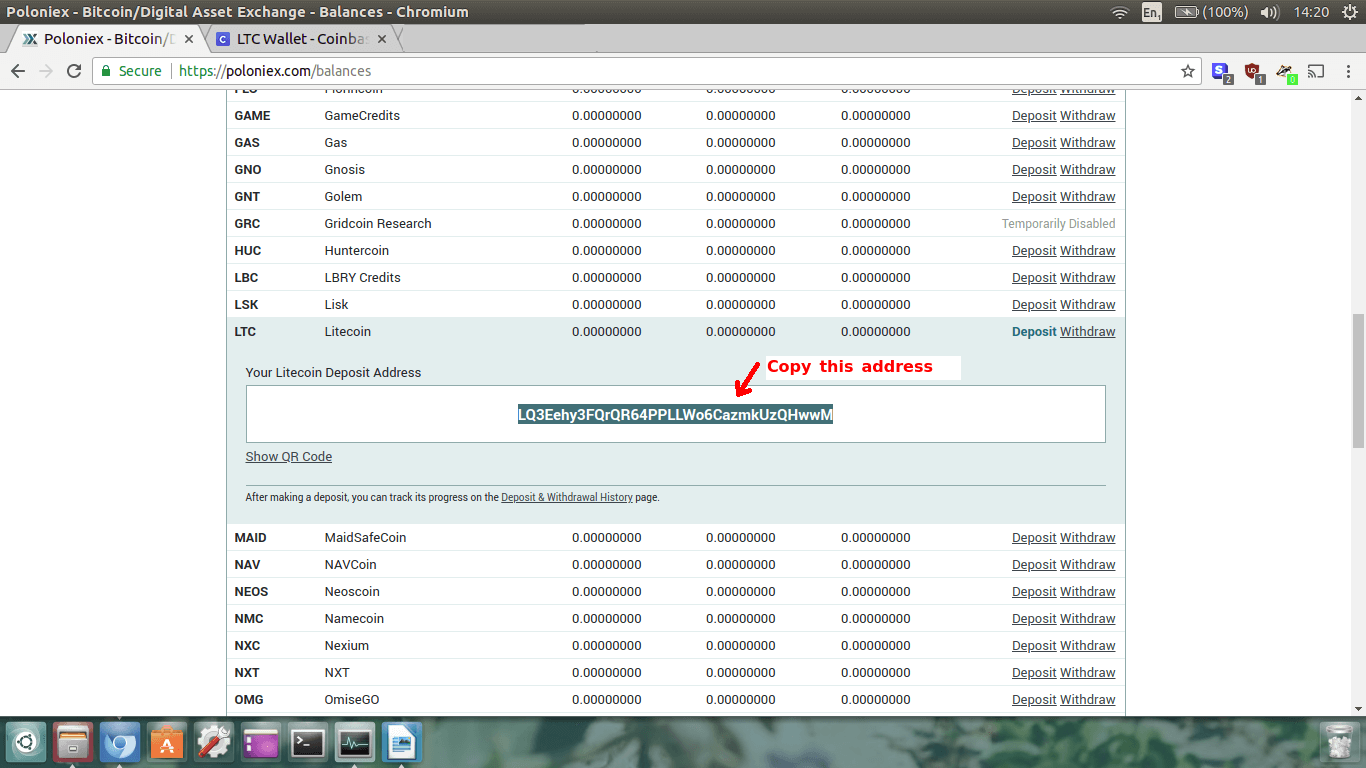
This is where we will find our Poloniex Litecoin Wallet address. We will send our Litecoin from Coinbase
wallet to our Poloniex wallet address here.
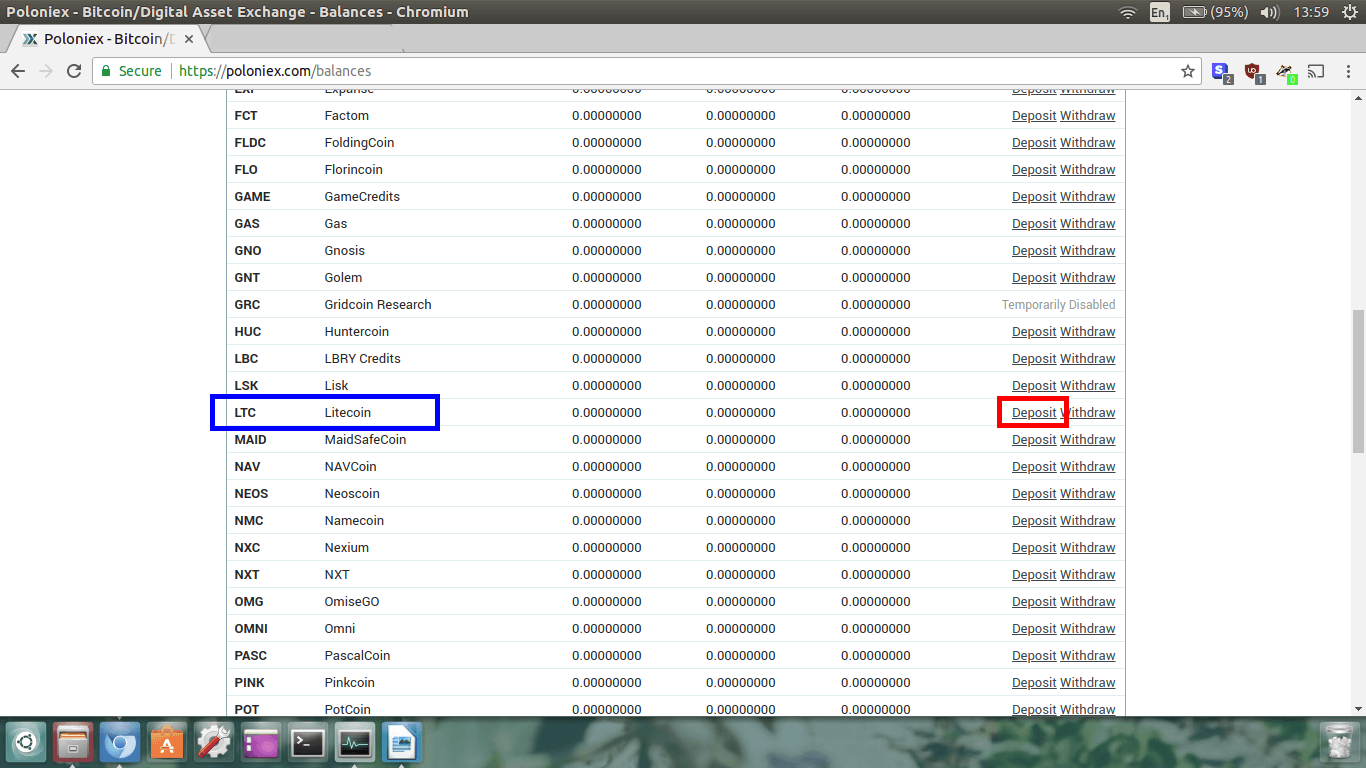
All the coins are listed alphabetically. Scroll down until you find
LTC Litecoin
and click
Deposit. LTC is the ticker code for Litecoin.
Awesome! Once you click deposit, your Litecoin
Deposit Address
will appear on the screen. Make 100% sure you have clicked Deposit, and not Withdraw or deposit for a
different coin.
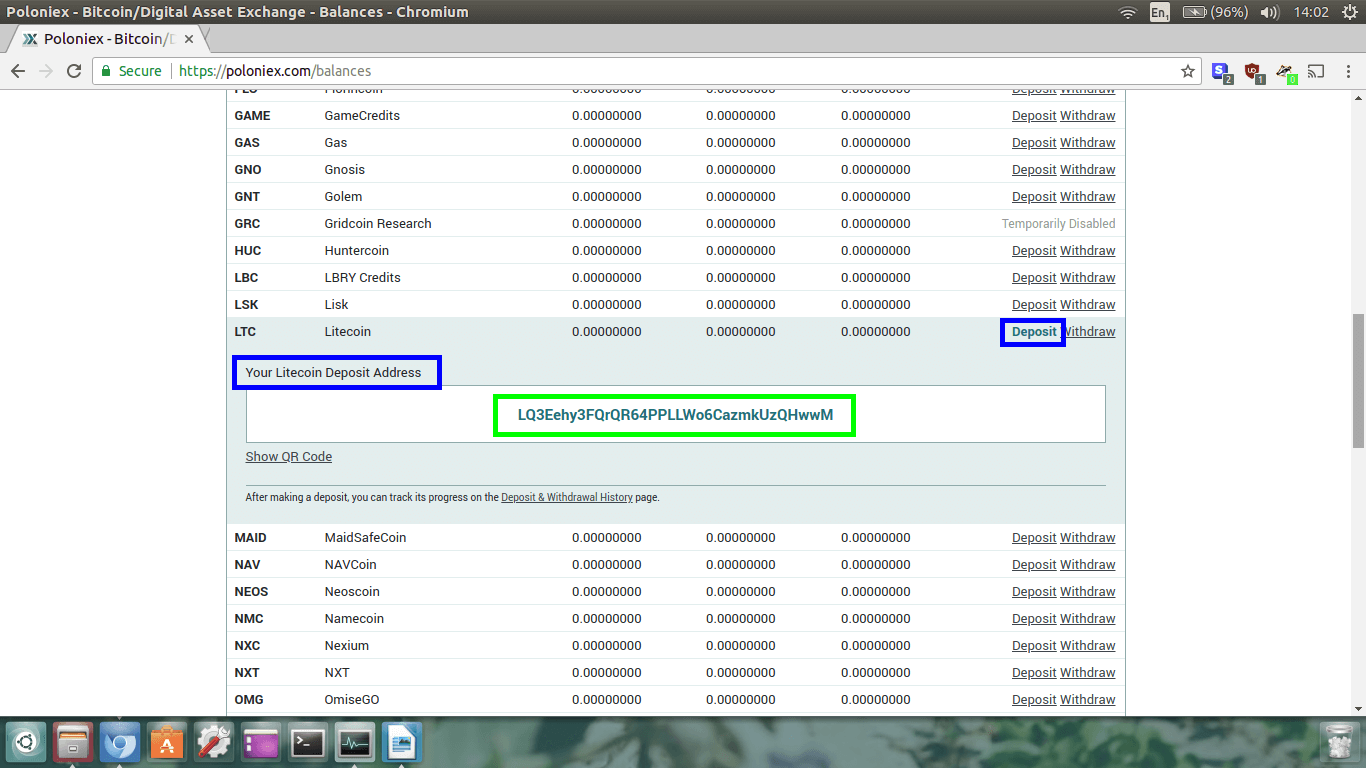
It should now say
Your Litecoin Deposit Address,
and then in a big white box in blue lettering, it will display you deposit address. We are going to send
the Litecoin on Coinbase to this address.
Don’t close your Poloniex Litecoin deposit page. Stay logged in
because we are going to need it in just a minute.
Step 15.
Go back to
Coinbase and login to your account.
Once you are back on your Dashboard click on
Accounts.
This will then display your accounts. Here we will see our Litecoin balance.
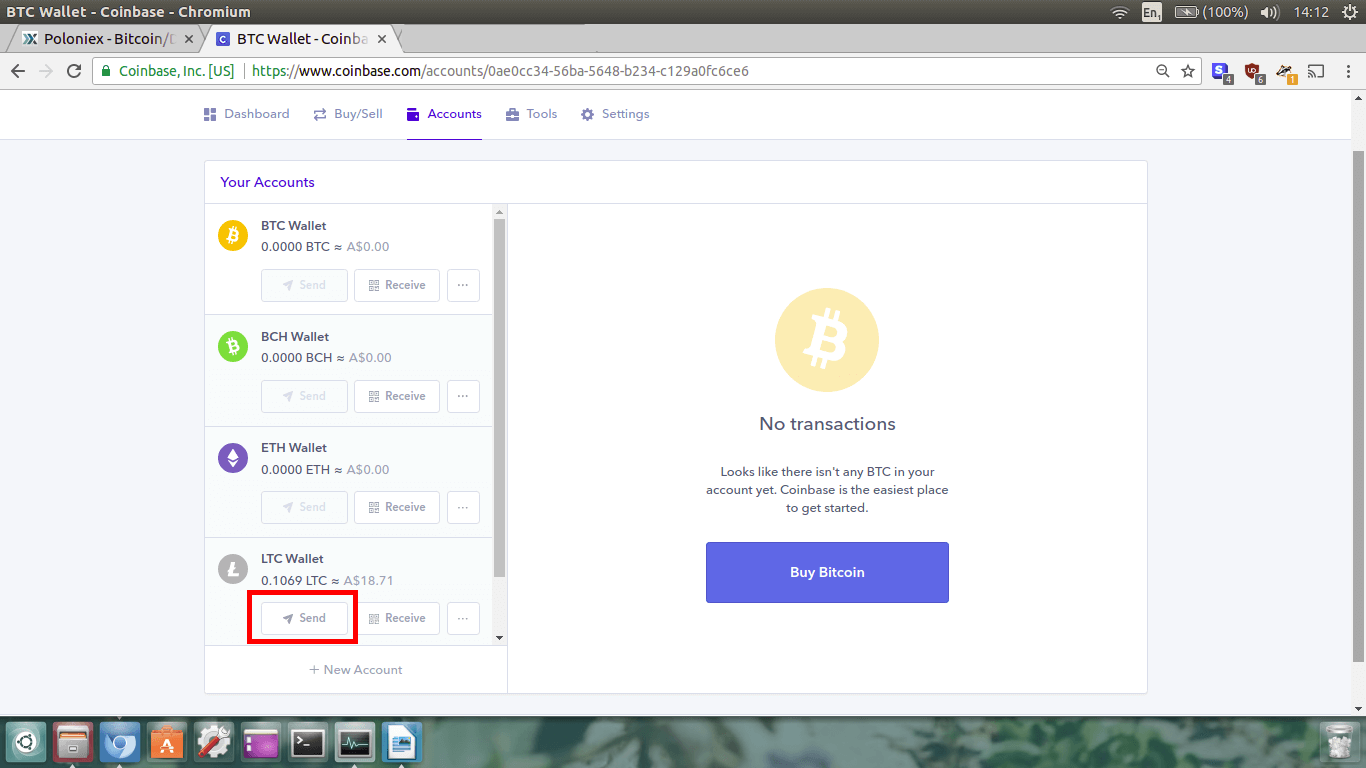
Click on the
Send button.
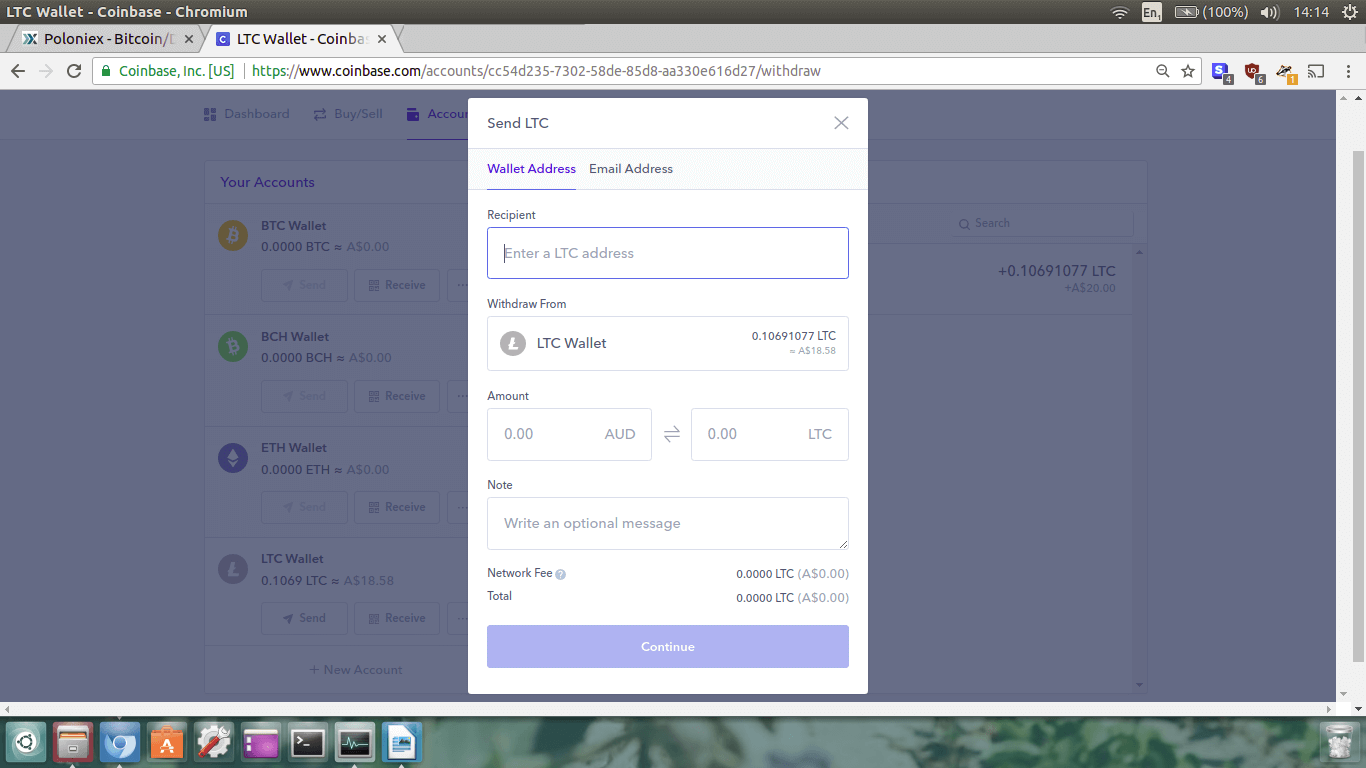
This is where we will enter in the address we want to send our Litecoin to. Now you need to go back to your
Poloniex Litecoin Deposit page, and retrieve your Litecoin address
so we can send our LTC to it.
Triple check that it is the correct address. Now, copy the address (highlight the address, then right click
and choose ‘copy’), then go back to the Coinbase send page.
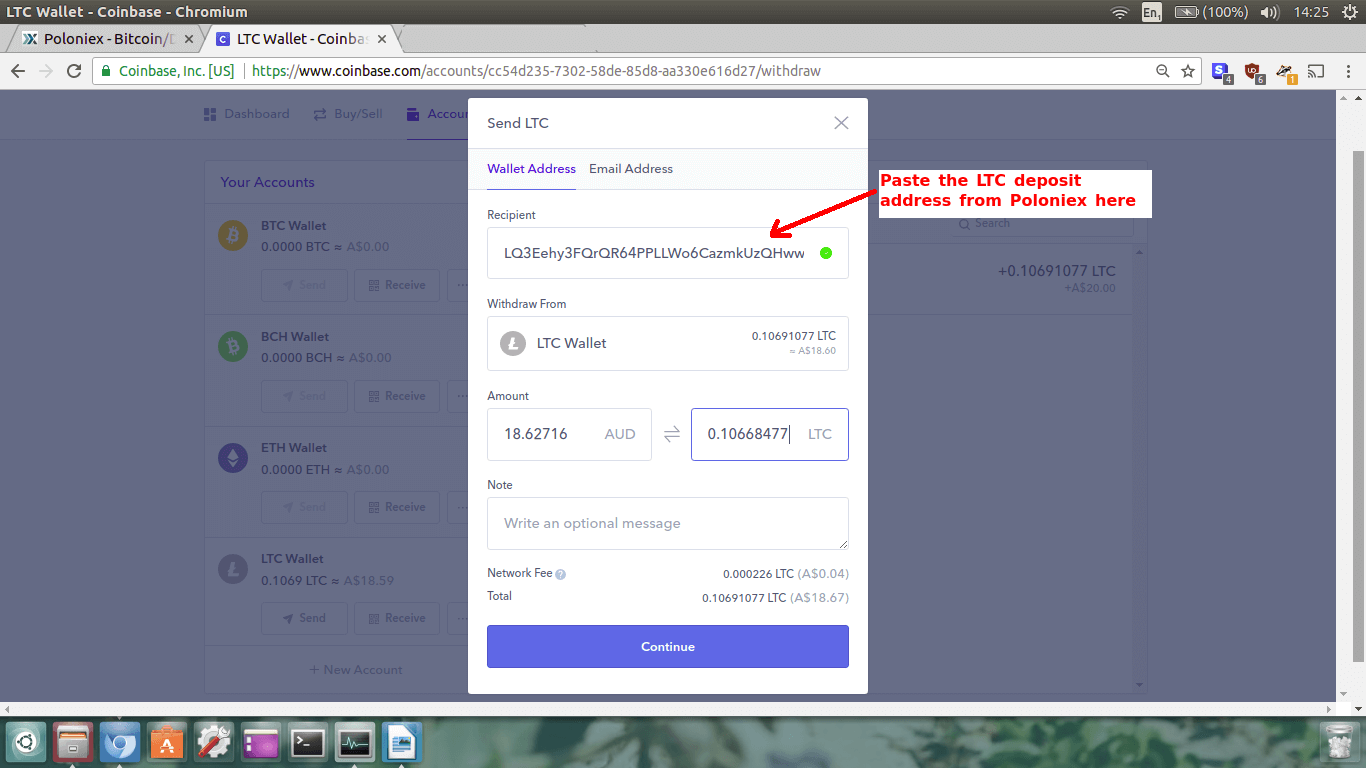
Paste the deposit address (right click then choose ‘paste’) into the section that says
Recipient. Now, we want to make sure we definitely got that right,
otherwise our money might not turn up. Check that the letters and numbers in the address match up on both
Coinbase and Poloniex. Do this twice at least!
We should also make sure there is a green dot next to the address we are sending to. This means that it is
a valid Litecoin address. If you don’t see a green dot, it means the address is incorrect and you need to
fix it up.
The next thing we are going to do is to choose the amount we want to send.
In the
Amount box that says
LTC,
enter in how much Litecoin you want to send. I am sending all my Litecoin because Monero is the best, and I want as much Monero as possible
Once you’ve done that, check that the address we are sending to is the correct one last time, then click
Continue.
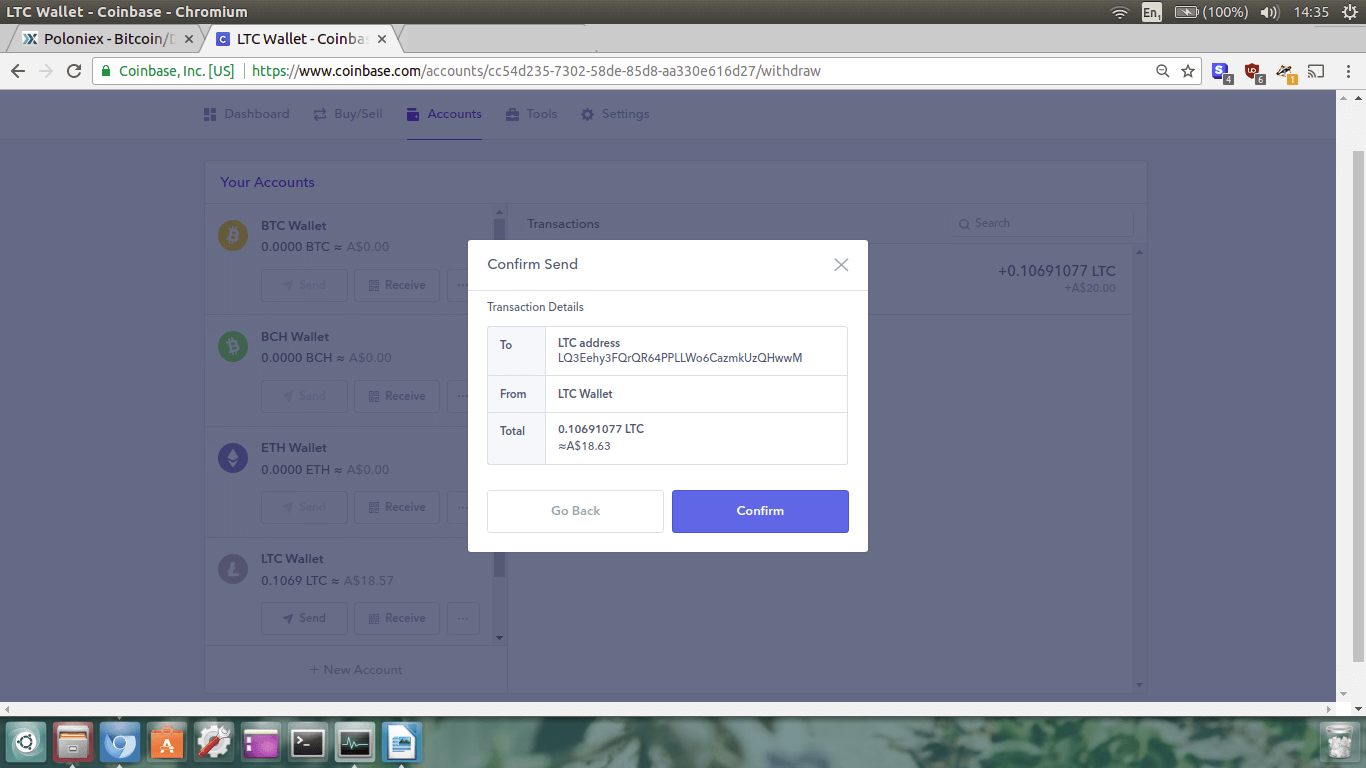
One last time, cross check the address you are sending your Litecoin to is the poloniex deposit address,
and check the amounts. If you are happy and everything is correct, click
Confirm.
Depending on your Coinbase security settings you may need to confirm the transfer by clicking a confirmation
link in an email Coinbase will send to your registered email address.
Congratulations! You just sent your Litecoin from your Coinbase wallet to your Poloniex wallet.
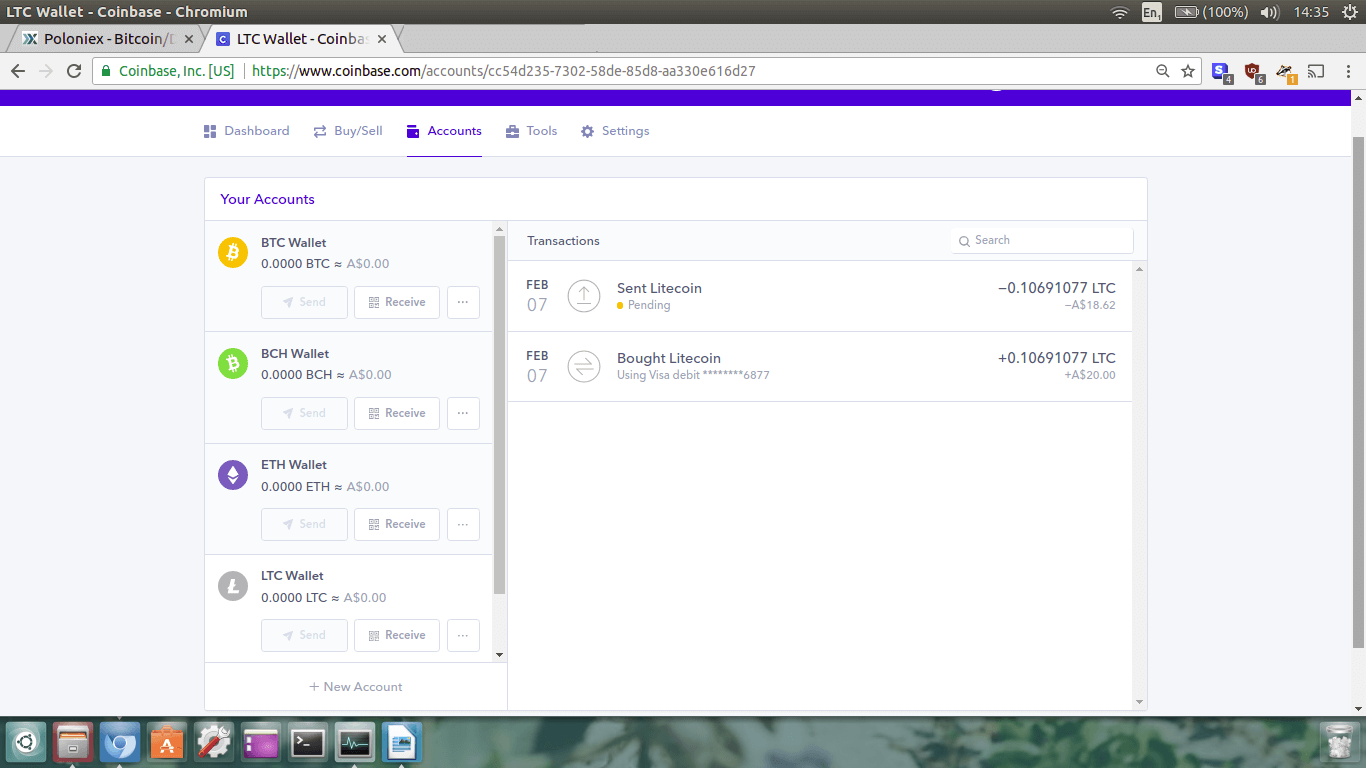
Back on your Dashboard we can see the Litecoin transaction is pending. Click on the transaction,
and you will see the information. If you can’t find the transaction information, from your Dashboard
click
Accounts and then the little … box next to the
Receive button to redisplay it.
When the transaction is confirmed it should appear in your Poloniex within about 5 -10 minutes.
Click back to the Poloniex
Balances, Deposits and Withdrawals page.
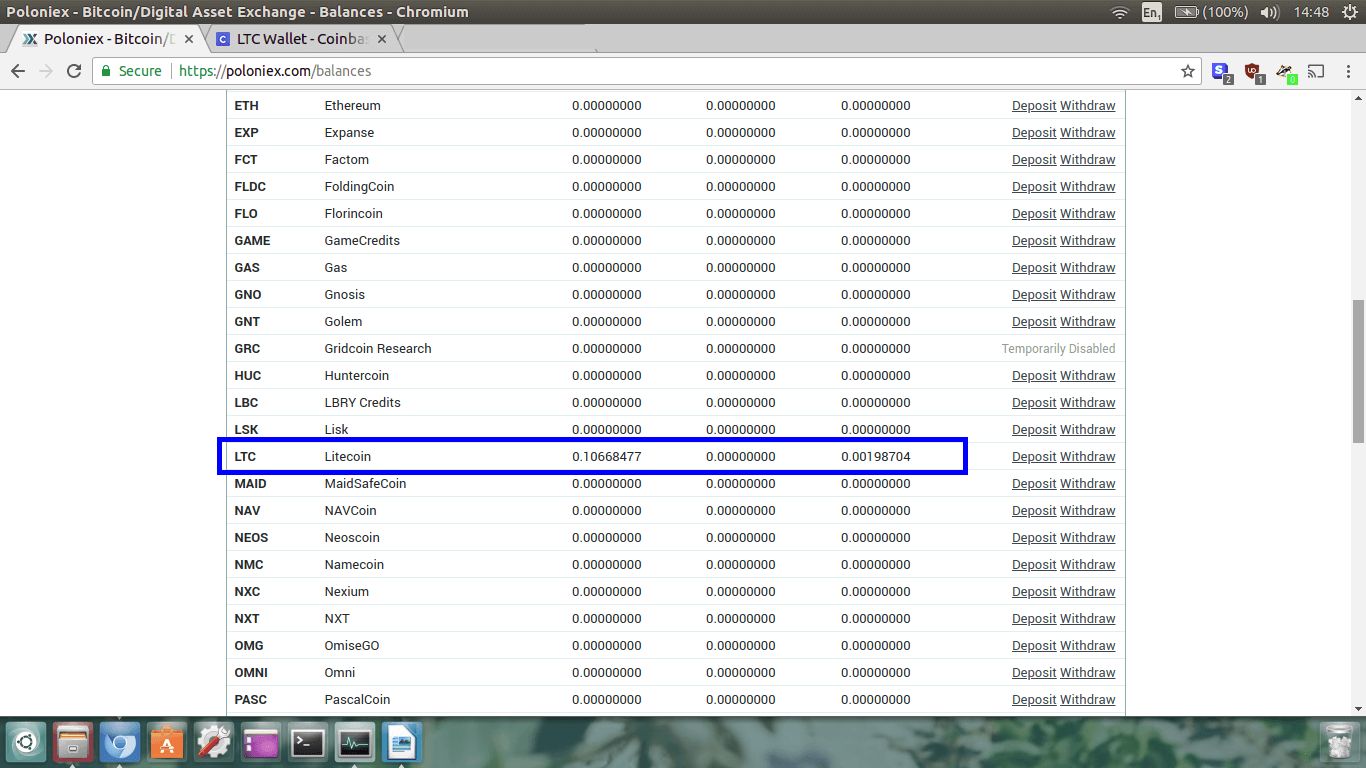
When the Litecoin has come through, you will be able to see the Litecoin appear in your balances.
Step 16.
Now we are going to trade our Litecoin for Monero. From wherever you are on the Poloniex website,
click the
Exchange button.
You will then be directed to the exchange page. Don’t be scared of all the moving numbers and
information. I’m going to show you how easy this is.
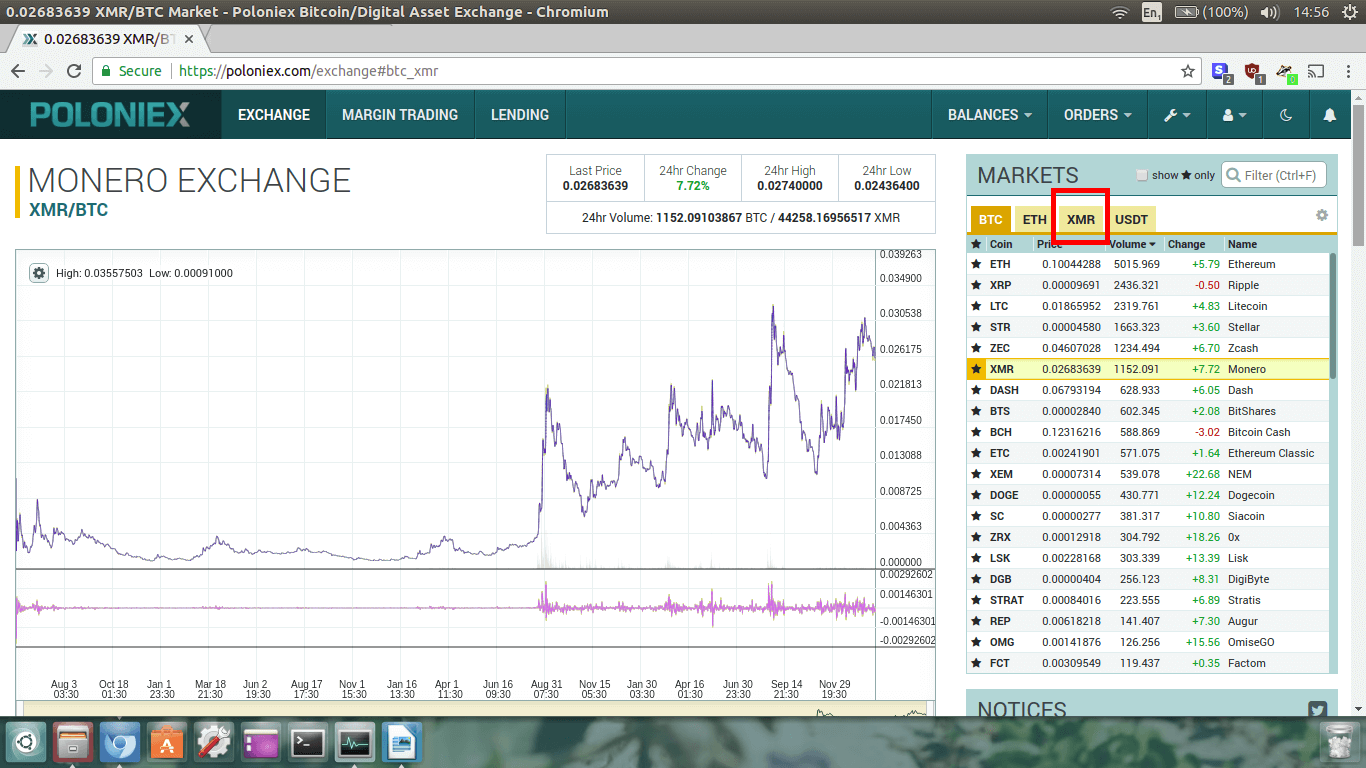
Because we are trading Litecoin (instead of Bitcoin) for Monero we need to find the LTC/XMR trading pair.
To do this, click the
XMR tab in the upper right hand area of the screen.
You will then be directed to the XMR trading pairs. Make sure you click on
LTC underneath the
XMR tab.
XMR is the ticker code for Monero.
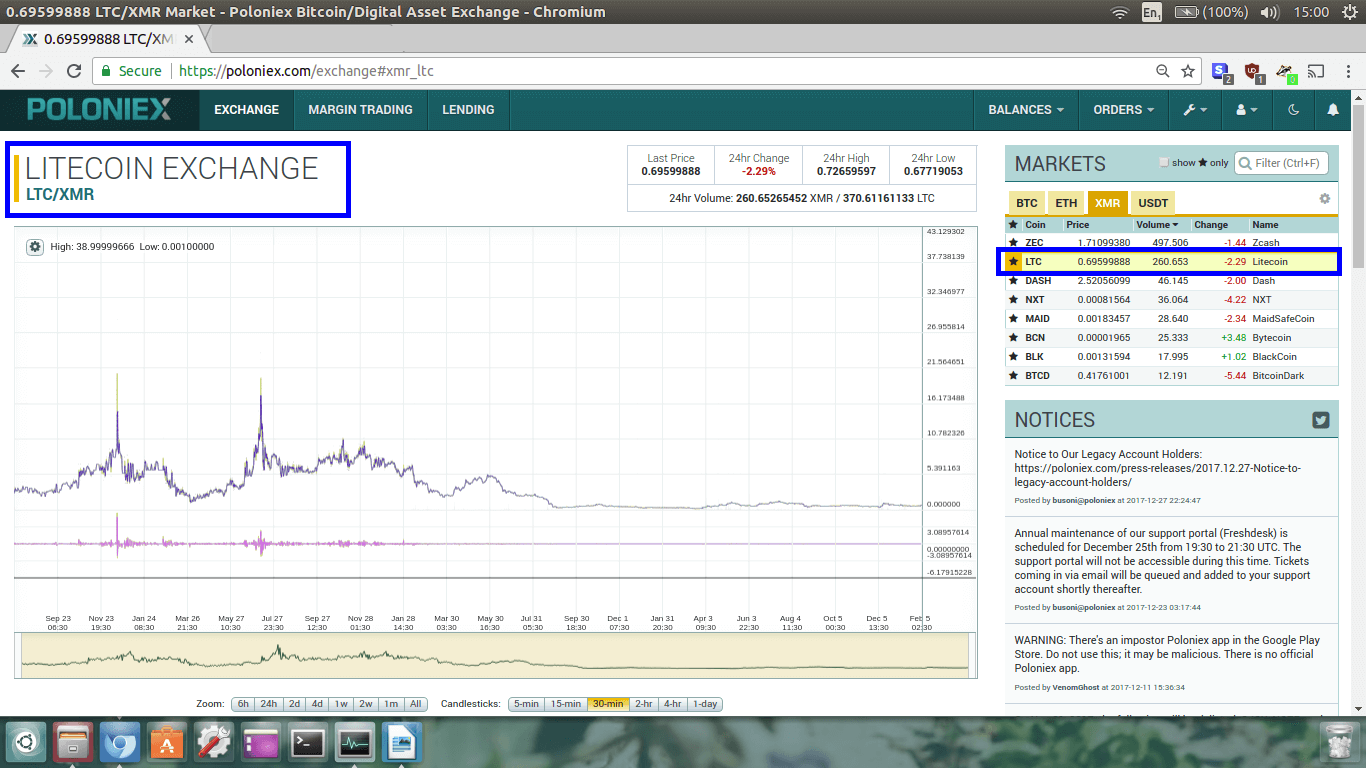
It should look like the image above.
Now scroll down the page until you see where it says
SELL LTC.
We want to sell our LTC for XMR.
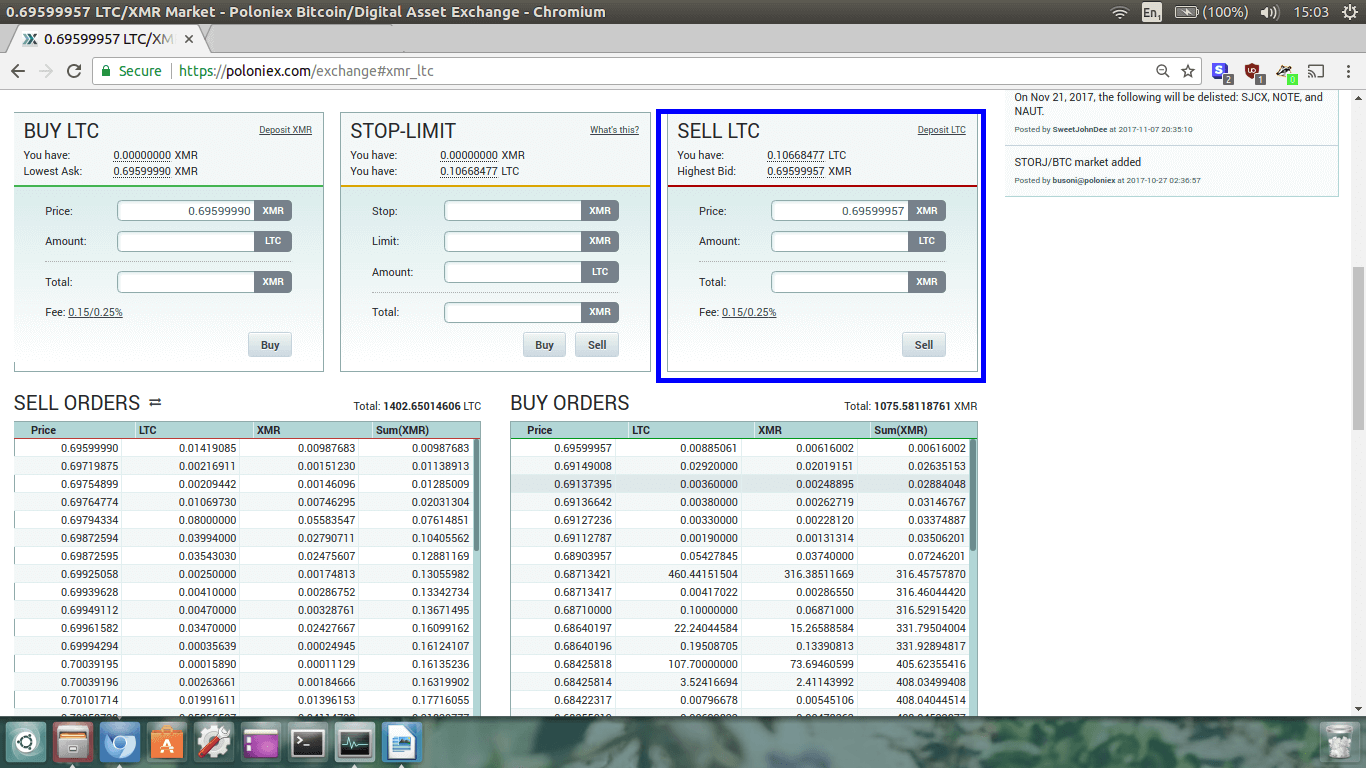
Now, what we do is simple. In the
SELL LTC section, we type in the amount we want to sell.
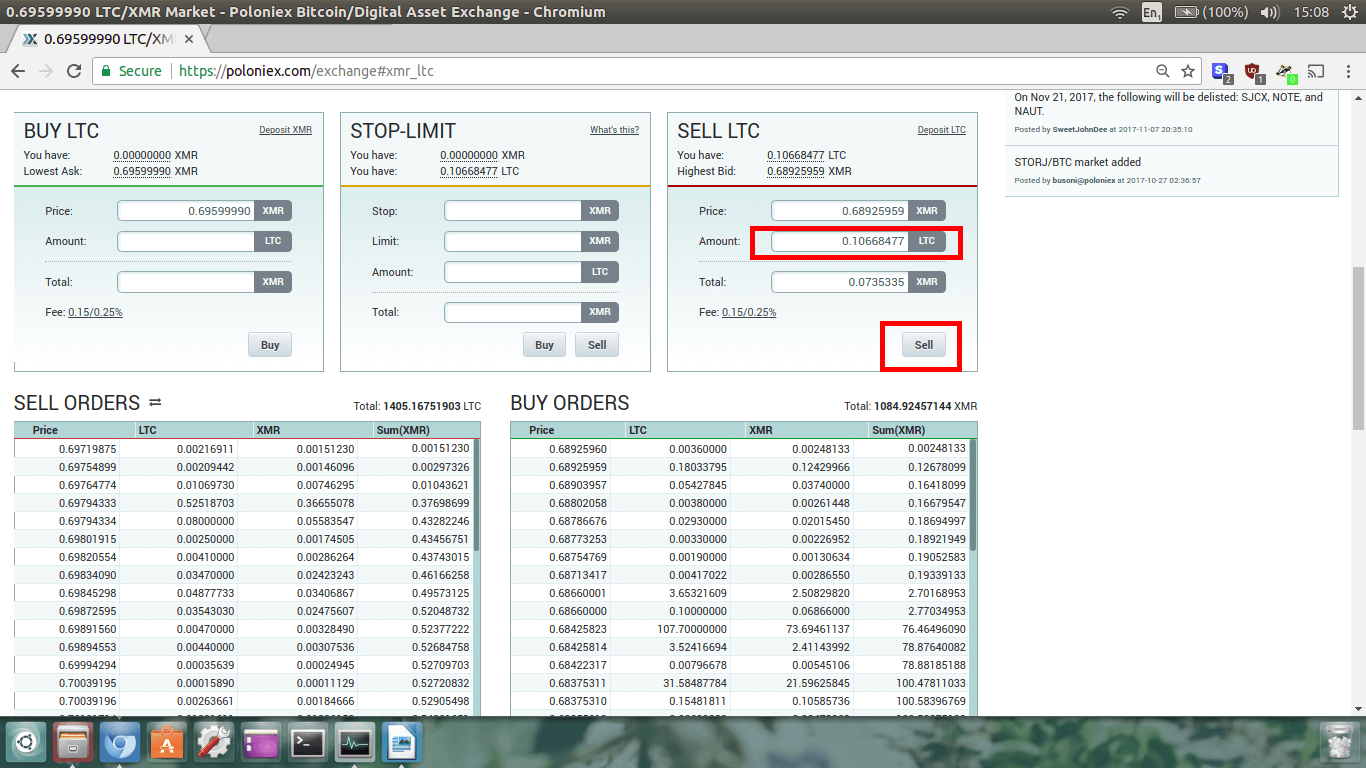
I’m going to sell all my LTC for XMR. You can sell as little or as much as you want. Once you have entered
the amount of LTC you want to sell, click the
SELL button.
It will then load up with an information box telling you that you just sold your LTC for XMR.
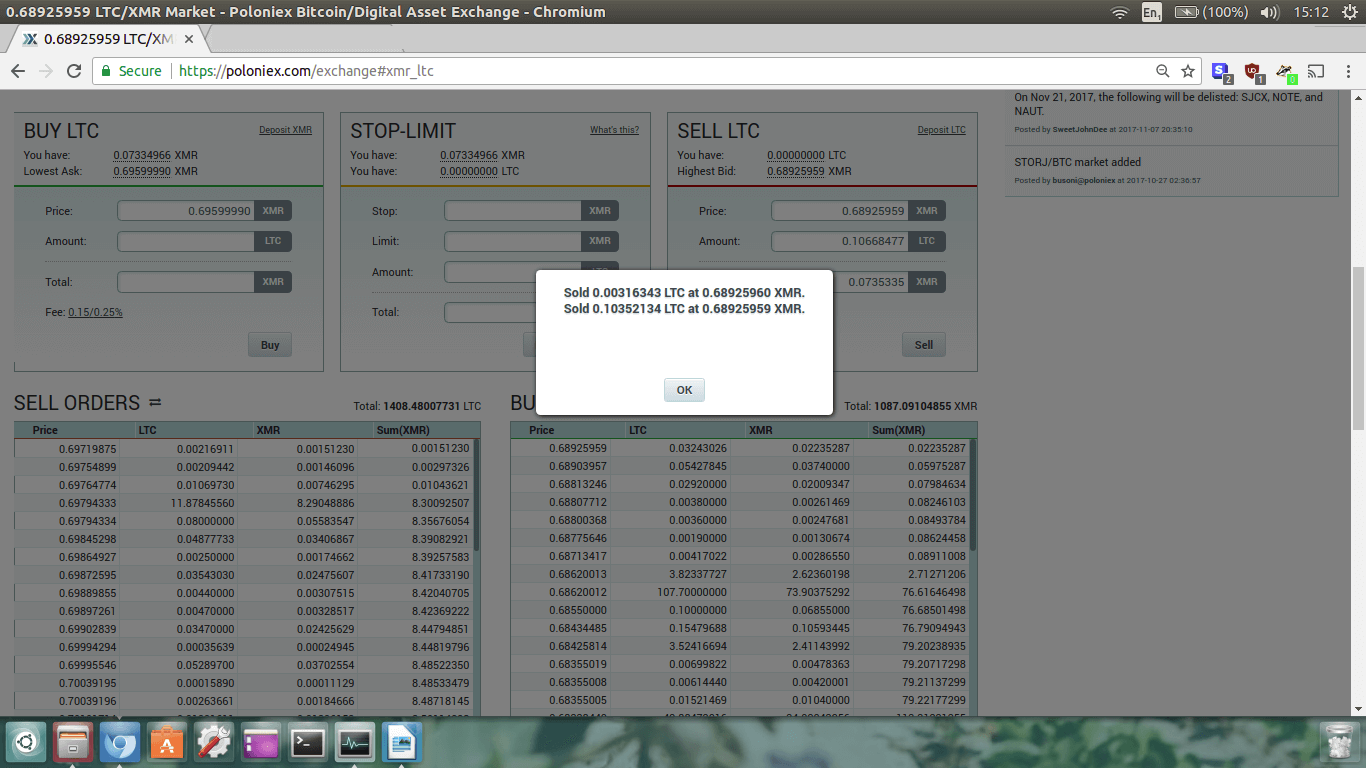
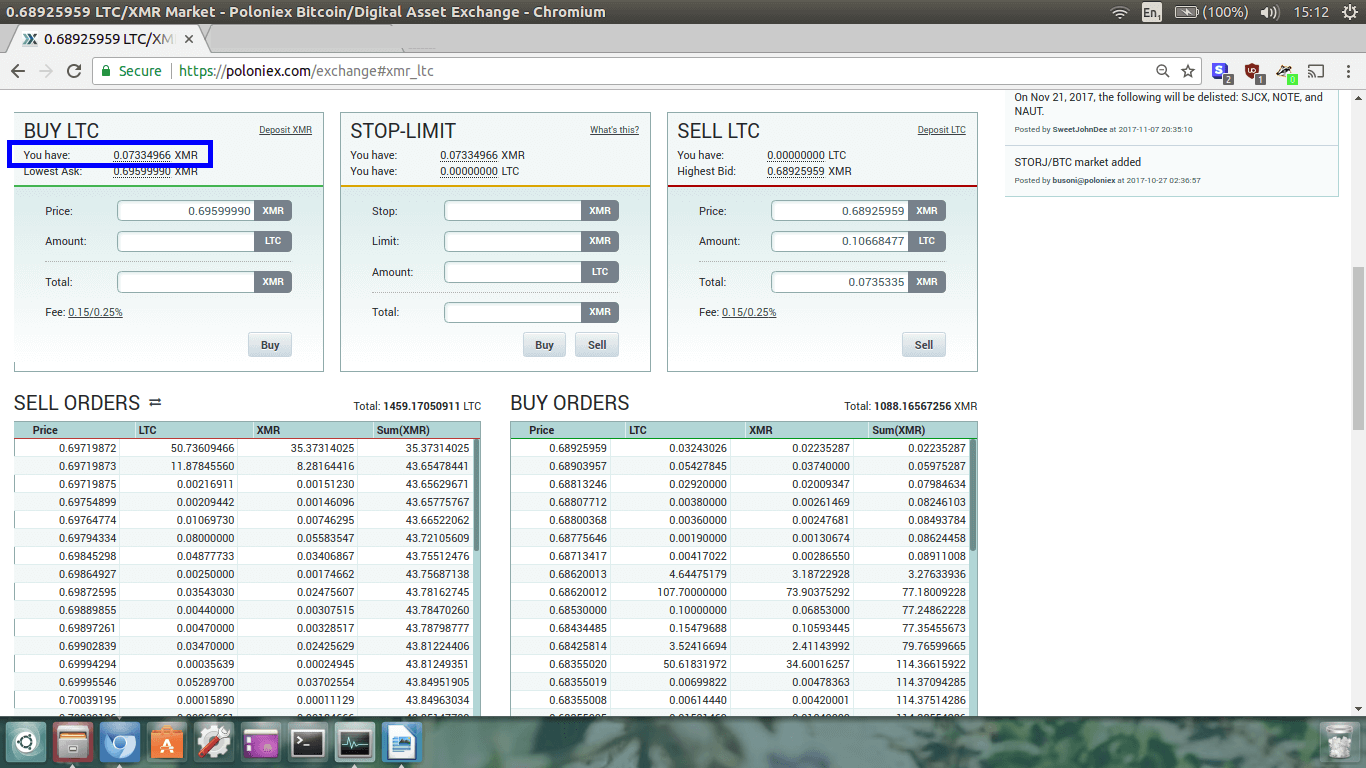
Now you can see that under where it says
BUY LTC,
it displays how much XMR you have. If the order doesn’t get filled just scroll down until you find
Open orders and cancel the order. Then you can just re-enter the
sell information again to ensure the sell goes through.
To double check our Monero balance, we can click back to
Balances,
Deposits and Withdrawals.

Scroll down and look for XMR. Remember, the coins are listed alphabetically, so XMR is near the bottom.
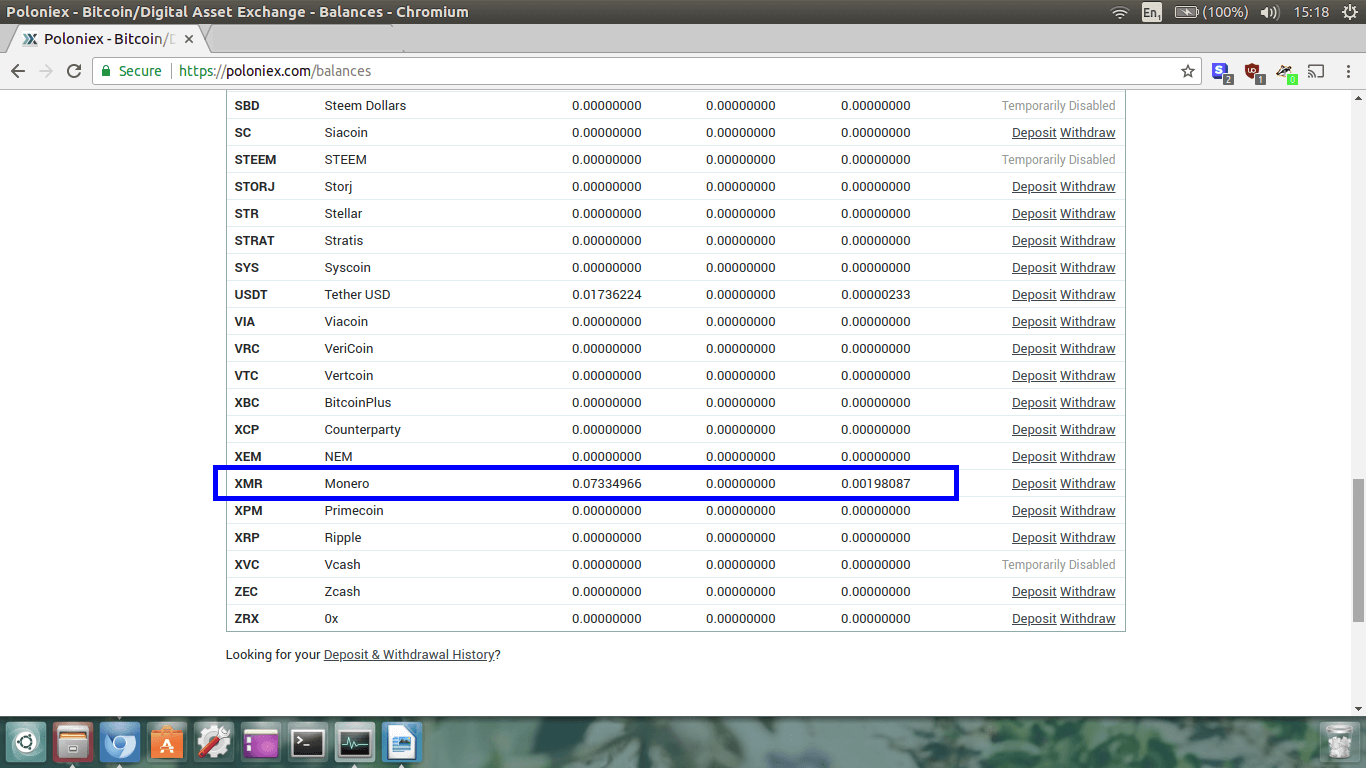
Congratulations! You did it, YOU NOW OWN MONERO!
I highly recommend you withdraw the Monero off Poloniex into a wallet you control.
You can use a
paper wallet or the
Monero GUI wallet.


 monero.how